Welcome!

This blog is here for you to find fun learning activities to do with your children. We share great ideas we find and love on the Internet, as well as ideas we come up with on our own! We also like to share resources we find helpful.

To find ideas for your child, click on the age range blog label or on the theme/topic you are looking for (on the left side of the page). In each post, we try to list optimal age ranges for the activity, but you must judge for yourself if it is appropriate for your child. When you try an activity out, please comment and let us (and everyone else) know how your child liked it!

Tuesday, October 16, 2012

Bringing out the artist in your child

One of my daughter's extra-curricular type activities is an art class at the co-op we go to on Tuesdays. Each week they learn a little about a new artist and do some sort of art project. I was thinking about easy ways to extend what she has learned to help her remember and I came across a website (I wish I could remember where....) that took famous works of art and turned them into color sheets for their kids.
So, along those lines, I came across a fun activity that used Picasa (a free photo program) to change photos into pencil drawings. Like this:

So, I googled Georgia O'Keeffe, let Charis pick a flower she liked, and turned it into a pencil sketch via Picasa. You can do straight coloring, or work on colors, shading, etc.


Or take your own picture of flowers outside (of a goldfish if working with Matisse, etc).

Monday, October 15, 2012

Go Away Big Green Monster! (book and activity)

Go Away, Big Green Monster! is a fun book to read this time of year. It is also very helpful if your child is having fears of something scary being around (like monsters). It helps give the child the idea that she is in control, not the monster.

Here is a fun activity to go along with reading this book.


Your child can make her own monster.

Supplies needed:
  • construction paper
  • paint
  • paper the same color as the paint


Have your child put a blob of paint on the paper--right in the middle. Then have her fold it in half. This will make a shape for the face of the monster. Then have her add pieces of paper for eyes, ears, nose, mouth, and whatever else her monster has. Then she has her own monster to tell to go away!

Friday, October 12, 2012

Seasonal Clouds

I don't know if you've ever noticed before (I hadn't until my husband pointed it out), but the sky seems to change as the seasons change, too. The Fall and Winter sky looks different than the Spring and Summer sky. We've had many night already to just stand in awe and watch the amazing colors and cloud shapes.


My personal experience is that the summer sky seems to be great for cloud shapes and the "What does that cloud look like?" game. The fall and winter skies, though, are my favorite. The color show we've seen, sunsets, and patterns of light have been amazing. So take a look---take your kids out, watch the skies, and compare. These pictures were all taken on the same night. Every few minutes we'd get a different view from the same portion of sky. So, go out, lay in the grass, play ball, play "Captain Hook" (which is why my little one is running), take a walk, and talk about it!

Monday, October 8, 2012

Top 5 Pinterest Halloween Finds

Here are some great ideas for Halloween!

50 Spooky Treats
by Sixsistersstuff


Pumpkin Scented Paint
by Growing a Jeweled Rose


22 Fall Sensory Play Ideas
by Your Kids Table

55 Halloween Crafts
by I Heart Naptime

31 Ideas for an Active October
by Toddler Approved


See more of what I pinned for Halloween here: http://pinterest.com/valplowman/learning-ideas-holidays/ and here: http://pinterest.com/valplowman/halloween/

Wednesday, September 26, 2012

Letter Tracer Pages


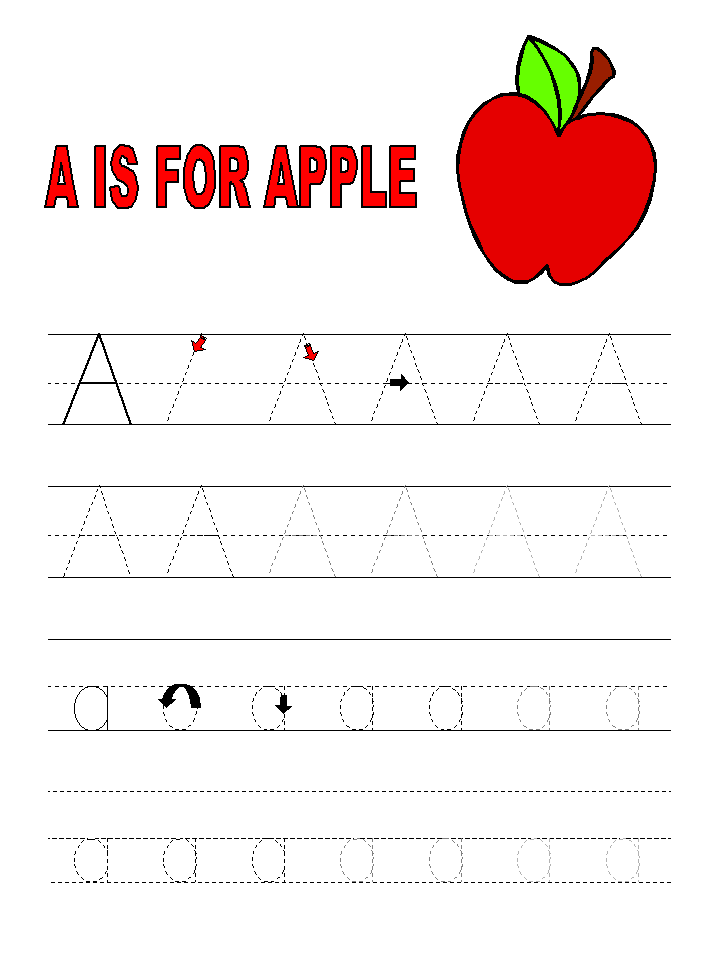
DLTK-teach.com is a great resource for learning activities. I recently ran across their tracer pages and had a great idea. I have been printing them off and laminating them. I print them double sided--so A and B are on the same paper, C and D, and so forth. Then I laminate. Then my girls can use either a dry erase or a wet erase marker and practice letters. You can also use a permanent marker and erase with finger nail polish remover, but I am not the type to hand my kids  permanent  markers. 

This is a great thing to have on hand for learning time. It is also great when you are cooking something in the kitchen and your child needs something to do.

Wednesday, September 19, 2012

Simple for Mom: Do a Dot Letter


Since I have a newborn at home, I need activities that can be fast for me to prep yet fun for my 3 year old to do. She loves do-a-dots right now. One day, I quickly wrote this block letter M out on a paper, gave her the do-a-dots, and let her decorate the M (the first letter in her name). She fully loved it!

Monday, September 17, 2012

Apple Math

This last week, we did an apple theme here. I came up with a couple new pages for the week and thought I would share them here.

The first was inspired by Raegan's: 

Apple File Folder Game- Counting


I wanted to do this, but didn't want to do the file folder thing. So I made this. I printed it and laminated it. I can write whatever I want on the baskets with a dry erase or wet erase marker. I think you can print from the image, but if not, here is the link in my google documents.


I had her first sort the skittles into three different bowls, then she put the correct number into each basket.


This was inspired by my 

Apple Seed Counting


I wanted to put the seeds on the apple and have the kids do math with them. The idea here is you put seeds in each apple, then the child counts and writes how many under the apple. You decide if the child is doing addition, subtraction, multiplication, division...write that in the square between the apples. The child writes the answer on the provided line. I liked this because I can use the same sheet for all three of my children. I laminated it so I don't have to do a bunch of printouts. My kids get a big kick out of using the markers to write. Here is the link in Google Documents.


Wednesday, September 5, 2012

Letters: Angled Lines


The other day, I had McKenna (3) practicing her pre-writing skills as Raegan described in this post:

Pre-Writing Skills


Once she was doing a good job at connecting the dots, we started to practice writing letters. We did the straight lines (like T) and curved lines (like C) with no problem, but the angled lines proved tricky (like A). Since she had done well with the connecting the dots, I had her first write the letter by connecting the dots like we had done in our pre-writing skills practice. It really helped her see how you create the letters with the angle. You can see the progress in the photo I took above (with my phone). So if your child has a hard time with the angled line letters, give this a try! 

It could also be applied to straight line letters. Or you could do a series of dots to follow for the curved lines. 

Monday, August 27, 2012

Number Race

This is an activity you can adapt to work with any theme you have going on that week. This week, it was bugs (Kaitlyn did this at preschool). You have six different items that go along with your theme and assign them a number. You then give the child a dice and have her roll it. Each time she rolls a number, she marks that number on her page. The first number to be filled up wins the race! 

For older children, you can add some challenge by having the child predict which number will win. After the activity is over, have him write about which number he thought would win and which did win. 

Monday, August 20, 2012

Shape Art


This one is super easy for you to do (can you tell I am into the easy things these days?).

Have your child create an animal. Have her draw the animal and then cut it out. Then have her cut out pieces of paper in the shape of your choice and glue them to the animal. In the end, you have some fun abstract art!

If your child is not old enough to cut, you can either cut for her or have her tear pieces of paper. For little ones, even if all they do is glue the pieces on, they enjoy it.

Thursday, August 16, 2012

The Ever Changing Collage

I have been missing in the blogosphere for quite awhile now.  In light of Val's precious addition and obvious busy-ness I thought I would try to finally post some of our recent activities. We are in the middle of a major move, so please bear with me. I'll do my best!

This ever changing collage is an activity I have done with J a few times over the past few months (3.5-4 years). I tape a piece of white contact paper upside down onto the table (the sticky side should be facing up). I then lay out an array of supplies for him to use to create his artistic masterpiece. I love that this activity truly ignites their creativity. J has evolved from created random collages to images that I can actually interpret clearly.

The fun aspect of this activity is that it is ever-changing. If they don't like the way a certain part of the collage looks, they can rearrange the pieces easily. This is perfect for my little perfectionist. If they begin to lose interest, just add a few new materials to the mix. Creativity rejuvenated!

Here is a picture of his more recent masterpieces.


This is our house and garage with a tree in the front yard, the sun shining, a bird flying, and colorful flower-buttons filling the garden (can't recall a time when my garden looked so good!).
The materials included foam shapes, colorful popsicle sticks, and colorful buttons. These seem to be his favorite materials to use since they leave nothing behind when removed from the contact paper. He gets annoyed when the other materials leave a tiny bit of fuzz or string behind. Did I mention he was a perfectionist?

We have also used pop poms, cotton balls, q tips, fabric pieces, ribbon, larger sequence, toothpicks, straws, pipe cleaners, jewels, rope, and shoe strings. I have found providing just 2 or 3 different materials at a time is enough for him. He gets overwhelmed if I put too many options in front of him. For the above example, I first gave him only the colored popsicle sticks. After he had time to play and create, I brought out the buttons and foam pieces. Bringing out the materials at different times really helps him explore each one's potential (and certainly makes the activity last longer!).

This activity would work for almost any age. Of course watch for choke hazards for those that like to mouth everything in site.

Wednesday, August 15, 2012

Beginning Sounds Caterpillar


This is a time of year I seem to equate with insect activities. I don't know why, but it is the way my head works. Maybe I am looking forward to saying good-bye to them as the colder weather is in sight? :)

This activity helps focus on first sounds. It is very simple. Draw or create on the computer several circles. Draw or create a caterpillar head. Then print, draw, or find in magazines things that start with the letter C. Have your child color them/cut them out/etc. Have your child glue them into the caterpillar circles.

As your child does this, ask what each thing is and emphasize the "c" sound.

Simple as that!

Monday, August 13, 2012

New Baby...


So I have a new baby at home! This is my fourth child, Brinley. She is just precious.

Things will probably be a little slower for a bit around here as we all adjust and get back in the swing of things, but we will be back. So hang in there! My goal is to still have one post each week for you. Have a fabulous end of summer!

Wednesday, August 8, 2012

Daily Shapes


Everything around us is made of shapes. Helping children see this helps them to learn and recognize shapes more quickly.

For this activity, you take a piece of paper and fold it in half, hot dog style. You can print something on the paper like this one is, or you can just as easily write on it. Draw or print lines between the shapes and either you cut or have your child cut the lines between the shapes.

Find pictures of shapes. These could be printed, drawn, or from magazines. Have your child cut and glue them inside the hot dog paper, so if your child opens the circle flap, she will see the things with circles. This picture shows the flaps all open so you can see what is there.

Simple, fun, and effective!

LinkWithin

Related Posts with Thumbnails