We do a lot of sticker sorting in this house. It is a great way for J to practice categories and also helps him with fine motor skills (getting the stickers off really works those pincher muscles). It requires little prep on my part and the only supplies necessary are paper and stickers! These activities also work really well on airplanes (easy to pack and keeps them occupied for a long time!). We travel a lot and I always have some type of sticker sorting included in our carry-on bag.
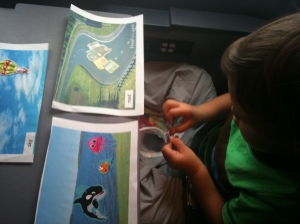
Prep: I printed out pictures of a road, the water and the sky. You could definitely just draw these as part of the activity on the plane. I then cut out stickers of things that were found in each location. I placed the stickers in a zip-up pencil bag. J pulled out one sticker at a time and decided which setting it should be placed in. This worked really well and kept him occupied for awhile (he had a lot of stickers to place).
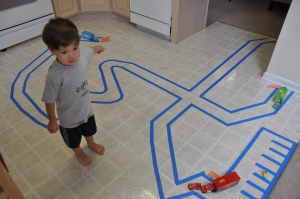
 We’ve also done a similar activity in a hotel room. I drew a train track, road and lake on some paper and he found stickers to place on each. He was then quite content to drive his cars around the tiny road for quite awhile!
Finally we’ve done something similar at a restaurant. I have a random assortment of items in my purse at any given moment. In this case stickers and index cards. We drew a setting on each one and he sorted the stickers.
 These type of activities would also work well for long doctor appointments and car rides too or at home of course.
Here are a couple other examples I’ve posted on in the past:
Sorting Colors with Stickers
Counting with Stickers
We’ve also done shapes, seasons, letters and animal homes. The possibilities are limited only by your sticker collection.
Prep: I printed out pictures of a road, the water and the sky. You could definitely just draw these as part of the activity on the plane. I then cut out stickers of things that were found in each location. I placed the stickers in a zip-up pencil bag. J pulled out one sticker at a time and decided which setting it should be placed in. This worked really well and kept him occupied for awhile (he had a lot of stickers to place).
 We’ve also done a similar activity in a hotel room. I drew a train track, road and lake on some paper and he found stickers to place on each. He was then quite content to drive his cars around the tiny road for quite awhile!
Finally we’ve done something similar at a restaurant. I have a random assortment of items in my purse at any given moment. In this case stickers and index cards. We drew a setting on each one and he sorted the stickers.

Here are a couple other examples I’ve posted on in the past:
Sorting Colors with Stickers
Counting with Stickers
We’ve also done shapes, seasons, letters and animal homes. The possibilities are limited only by your sticker collection.


