Welcome!

This blog is here for you to find fun learning activities to do with your children. We share great ideas we find and love on the Internet, as well as ideas we come up with on our own! We also like to share resources we find helpful.

To find ideas for your child, click on the age range blog label or on the theme/topic you are looking for (on the left side of the page). In each post, we try to list optimal age ranges for the activity, but you must judge for yourself if it is appropriate for your child. When you try an activity out, please comment and let us (and everyone else) know how your child liked it!

Thursday, November 17, 2011

Pilgrim Cookies

 
I saw these pilgrim hat cookies and thought they were adorable and something even a toddler could accomplish. I did make a few quick changes from the original I saw here. Their cookies were more accurate and cuter, but a few changes meant J could be that much more involved (and truth be told, I don’t think I could’ve iced a buckle so small).
We used yellow Reeces Pieces for the buckle instead of the yellow icing and I went with a chocolate covered cookie instead of the ginger snaps (because I don’t like ginger snaps so much!). I did try cutting a marshmallow for the white band around the middle, thinking J could create every part. I couldn’t get the marshmallow to look right, so I scrapped that. Maybe someone else has good luck with it though.
TO MAKE:
You need:
  • small brown cookies (I used Archer Farms “Dark Chocolate & Caramel indulgent cookies from Target, just 8 in the box, so good for a small group)
  • Small Reeces Peanut Butter Cups
  • Yellow Reeces Pieces (or M&Ms)
  • White icing
What you do:
  • Squeeze a drop of icing onto the center of the cookie. Stack the Reeces Peanut Butter Cup on top (upside down). Line the base of the RPC with white icing. Use the icing to “glue” the yellow Reeces Pieces on as a buckle.
These cookies were really good and REALLY rich (dark chocolate caramel cookie with Reeces Pieces AND Reeces peanut butter cup…. not really part of any diet). Last year J and I gathered all his cousins to work on these the morning of Thanksgiving.  They gave them a part in preparing the meal (the best part of the meal… dessert!). Everyone loved them.
They have the side benefit of providing the opportunity talk about the origin of Thanksgiving. I used it as a review of who the pilgrims were.

Becca also blogs at Fun & Engaging Activities for Toddlers.

Wednesday, November 16, 2011

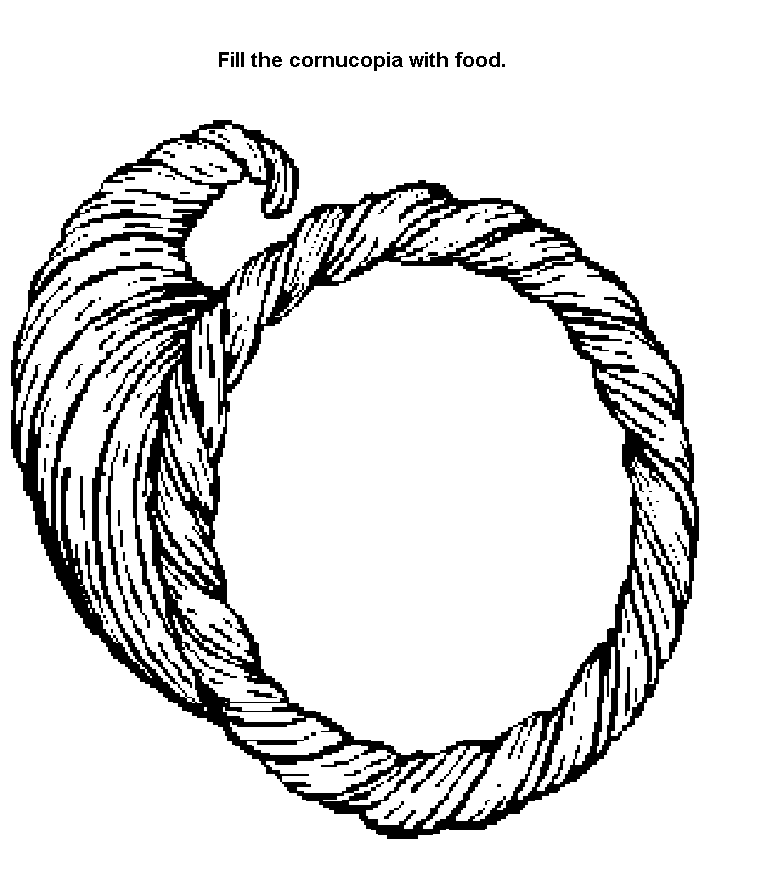
Cornucopia of Thankfulness


November is definitely a time when our thoughts are centered around what we are thankful for. This activity provides that focus for children while building fine motor skills as well as pasting skills.

Supplies Needed:
Activity
  • Have your child color the cornucopia and glue it to the construction paper.
  • Have your child go through magazines to find things they are thankful for and cut them out. 
  • Have your child glue those things into the cornucopia. 

Monday, November 14, 2011

Thanksgiving Turkey Card


This is a cute gift to give people at Thanksgiving time--I am thinking Grandparents or parents if you teach young children.

You make a cut out of the child's hand. Then you have the child list things she is thankful for and write them on each finger/thumb. You then add a head, eyes, etc. The poem says:

This isn't just a turkey,
as you can plainly see.
I made it with my hand,
which is a part of me.
It comes with lots of love,
especially to say,
I hope you have a very
Happy Thanksgiving Day!

Thursday, November 10, 2011

Turkey Countdown to Thanksgiving

We used our turkey countdown for the first time last year.  It's held up to reuse again this year!

I saw this cute Thanksgiving countdown and had to try it. I adapted it a little so that I could reuse it every year (or at least for a few years). I used foam and cardboard instead of construction paper and cardstock. I also made it magnetic and keep it on our fridge.
Our turkey actually isn’t this full yet, I just took a picture of what he would look like in all his glory. J adds one feather to him each day. You could do the reverse and pluck a feather each day, pretending to ready him for Thanksgiving dinner. I think older kids would find that really funny actually.
First check out the original site if you like to change things up each year and are ok with a temporary version. I liked how she made the head 3D.  
Since J is so young I know that this will still be exciting for him next year.
My materials: colorful foam, cardboard, googly eyes, adhesive magnets and glue. It took about 30 minutes to make, but could be done much faster since I had to redo things a few times or find new materials to work with. This is also something your little one could help make. I just did it during naptime since our week is so busy and wanted it done in time for a decent countdown.
How I made it:
1. Cut the feather strips out of colorful foam. (You want thin strips so they fit behind Mr. Turkey, especially if you plan for a full month’s countdown.)
2. Attach an adhesive magnet to the top of each strip. This will allow you to have that fanned look to the feathers. If you place the magnets closer to the bottom, they will simply create a single file line across the turkey’s back. (This was my first mistake!)
3. Cut two circles out of brown cardboard, a large one for the body and small one for the head. **I suggest having a very large body so you have plenty of room for your feathers to fan out, especially if you plan to start on Nov. 1st. The cardboard circles that come with frozen pizzas work great.
4. Glue the smaller circle onto the larger one.
5. Cut out a strip of cardboard and glue on the back of the large circle. **Place it on the base of the body since the feather strips will be stuffed along the top. (This was my second mistake!) When dry, place 1-2 magnetic strips on the back of the turkey’s body. The cardboard backing allows Mr. Turkey to be lifted slightly when attached to the regrigerator. This allows the feathers to slide behind him easily.
6. Cut out the feet, beak, and snood and glue them onto the turkey, along with the googly eyes.
7. Test it out before getting your little one’s excited about it. I’m glad I tested it first since I needed to rearrange the magnets on my pieces. Now we have a cute turkey that J can easily slip a feather behind on his own each day.

Becca also blogs at Fun & Engaging Activities for Toddlers.

Wednesday, November 9, 2011

Top 5 Pinterest Thanksgiving Finds

Here are my five favorite things I have on my Pinterest for Thanskgiving ideas!

Treats from Ourbestbites.com
http://www.ourbestbites.com/2010/11/oreo-turkeys-and-cookie-pilgrim-hats/


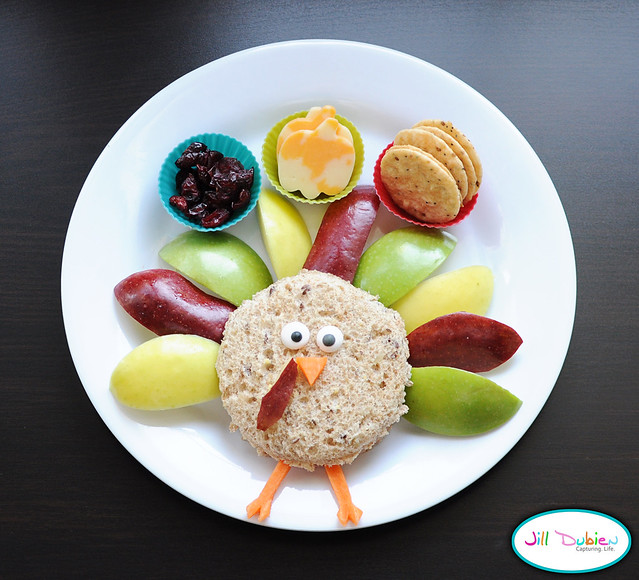
Lunch from Meet the Dubiens
http://meetthedubiens.blogspot.com/2011/10/fun-food-friday-tommy-turkey.html


Turkey Countdown from Make and Take
http://www.makeandtakes.com/counting-down-to-turkey-time


And see our own Becca's version here:
http://www.makeandtakes.com/wp-content/uploads/Thanksgiving-Countdown-Craft.jpg

Thanksgiving Galore from KatharineMaries.com
http://katherinemariephotography.com/blog/archives/7375

There are at least 11 Thanksgiving ideas in this post

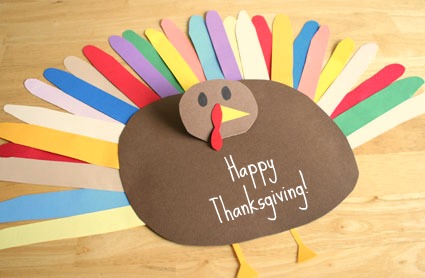
Turkey Craft from DLTK.com


You can follow me on Pinterest here: http://pinterest.com/valplowman/

Monday, November 7, 2011

Thanksgiving Books 2011

Here are five new recommendations for you for Thanksgiving books this year!

Fancy Nancy: Our Thanksgiving Banquet

Love Fancy Nancy books! You can't go wrong with these.


The Littlest Pilgrim

This is about a little pilgrim, but the things she can do even though she is small. This made me think of my youngest because she is smaller than the rest of the family, but always finding her own way to contribute.


Give Thanks for Each Day by Steve Metzger

I love that this book focuses on all of the things we have to be thankful for daily.


Thanksgiving Is Louise Borden

A simple book about Thanksgiving.


This First Thanksgiving Day: A Counting Story by Laura Krauss Melmed

This is a counting book about Thanksgiving!

Wednesday, November 2, 2011

Thanksgiving Round-Up 2011

Here is the round-up for our previous Thanksgiving posts:

Apple Turkey
Cute, yummy, fruit, fine motor development, patterns...all good.


Thankful Basket
For teaching Gratitude.


Paper Plate Turkey
This is a super cute craft that teaches colors, counting, fine motor, and following instructions.


Pumpkin Turkey
This is another cute decoration for your Thanksgiving holiday!


Involving Young Children on Thanksgiving Day
Tips for getting your young children involved in this holiday that can seem ambiguous to them.

Making a Menu
Have your children make a menu for the big meal.

Thankful Place Mat
Have your children make a place mat to eat off of that shows the things they are thankful for.

Positional Words: A Thanksgiving Game
A game for all ages.

Turkey Table Toppers
Make some center pieces for your meal.


Thankful Drawing
Get the whole family involved in drawing a picture of the things you are thankful for.


Thanksgiving Books
Thanksgiving Books 2009
Thanksgiving Books 2010

Friday, October 28, 2011

Bats!


My girls are freaked out by bats. I don't know how or why this happened (since neither parent has bat issues), but somewhere along the way they got the idea that bat=bad. So, added to our Halloween/pumpkin week was also a day of bat fun! We read Stellaluna first (I love that book! There's a special place in my heart for that sweet little critter!). We read the book slowly, taking time to talk about what she ate, her habits, the bird comparison, etc.

Then we made the I Know A Lot About Bats book. For my 2 year old I printed off pictures of the bats (one hanging upside down, one eating fruit, a moon for nighttime, and others).

Then we reviewed the letter B. I used capital B's to make the wings and let them glue and create. I also printed out a few pictures of a bat flying, used contact paper to laminate it, and cut in into increasingly more difficult puzzles for the girls to solve.

Then, for my 4 year old, we worked on drawing bats. She loved it! It fit in well with reviewing -at words,too.

Thursday, October 27, 2011

5 Great Halloween Ideas

You know how you start to look around the internet and find tons upon tons upon tons of great ideas out there for {insert item here}. Since this is a learning blog, I am thinking about learning activities available.

I have fallen into love of Pinterest like many of you. A great thing for me and Pinterest is putting ideas I love for learning ideas all in one place. I don't want to keep these ideas to myself! I thought I would share my top 5 ideas I have seen for fun fall ideas...you know, because you probably can't find enough (wink wink).

Don't Eat Frank Game
Prepared Not Scared


Yummy Treats!


More Yum


Halloween Party Planned


Banana Ghosts


Wednesday, October 26, 2011

Candy Corn Tissue Art


Here is a fun and simple Halloween activity that is also benign (meaning, it is not scary in the least. Another bonus, for those of you who don't like Halloween, it is a seasonal activity that is about candy, not Halloween). 

Kaitlyn did this in her preschool class this year. You can see it is rather simple-- white triangle and tissue paper squares. The tissue paper was not glued (hence the missing square), but rather was dipped in water and put on the paper wet. When it dried, it stuck.

Here is the cool possible bonus. Kaitlyn's teacher has done this in the past, but the tissue paper bled onto the paper, so the color transferred. That is what she was going for (she didn't know what happened--apparently the tissue paper brand or type might be of importance). If yours does bleed, you would want to remove the tissue paper before it dried so it didn't stick to the white paper.

I am going to try this out with different tissue papers and see if I can figure out which papers work for bleeding. My guess is the waxy feeling paper will not bleed while the rougher feeling paper will. I am starting with cheap dollar store paper...I will keep you updated when I have answers, but until then, I wanted you to have the chance to do this if you wanted! 

Tuesday, October 25, 2011

Halloween Recipes


DearlyDomestic.com has some great Halloween recipes posted, including this one for Candy Corn Pudding. Looks like I need to add Cool Whip to my shopping list for this weekend. This may be perfect for our Trick-or-Treat get together for all the kiddos to snack on!

It also looks easy enough for the kids to help put together, too!


Candy Corn Pudding

*2 Large Boxes of Vanilla Instant Pudding

*Yellow and Orange Food Coloring

*Cool Whip

*Candy Corn


Make pudding according to directions on box. Separate finished pudding into 2 separate bowls evenly. Color w/ food coloring. Top w/ a layer of Cool Whip and candy corn! Enjoy!!

Monday, October 24, 2011

Paper Plate Ghost


Paper plates are amazing. I think you can turn a paper plate into just about anything. 

Here we have a paper plate ghost. 

Supplies:
  • Paper plate
  • White paper (if arms are desired)
  • White crepe paper
  • Black paper
  • Scissors
  • Glue or stapler
Method:
This is a simple paper plate activity because the end-product is white. 
  1. If hands are desired, draw and cut out the arms/hands. Either you do this or have your child do it if scissor skills are up to it.
  2. Cut out black eyes and mouth. You can draw and cut out, or you can draw and have your child cut out, or have your child draw and cut out. You will know what is appropriate for your child.
  3. Cut several pieces of crepe paper.
  4. Glue or staple all pieces on. I like glue because the child can do it, but a staple has the potential to hold better.

Thursday, October 20, 2011

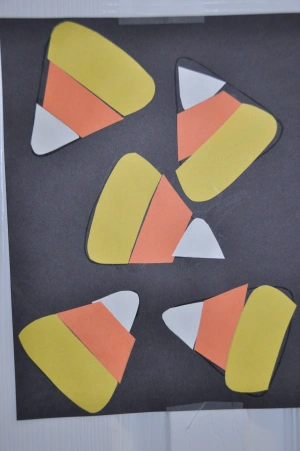
Candy Corn Puzzles


I thought this would be a good activity to work on sizes. I prepped the activity by precutting the pieces, creating small, medium and large pieces similar to candy corn. If you can tell in the picture, I also drew the outline of the candy corn on the black paper. This step probably wasn’t needed though. J glued the pieces in order (small, medium, large) to create the candy corn. I did have examples of candy corn out since he’d never seen them before.  This was simple to prep and good practice for J.

We also used this same concept to create door knob hangars for J’s cousins. I precut the black paper, including the circle for the door knob and J decorated it with a smaller version of the candy corn puzzles and adding their name. Later I covered them with clear contact paper for durability. You could also use foam or cardstock if you didn’t want to “laminate” them.


Becca also blogs at Fun and Engaging Activities for Toddlers

Wednesday, October 19, 2011

Halloween Fun: Face Painting


I remember one time as a child standing in line for over an hour to get my face painted. That is dedication! Children seem to love to get their faces painted. Now, I am no artist. You can, however, easily paint fun holiday themes if you break down the picture into simple shapes.

Take the jack-o-lantern pictured above. A simple orange blob, some black eyes, nose, and mouth, and a green stem and you are done. I didn't make that, though, my sister-in-law did, and she is an artist. 


Here we have a spider web. You have a white web made from drawing various lines. You then have  black spider, which is made from drawing a couple of circles and some legs. 


Finally, we have a simple ghost. A white oval-ish with some black eyes and nose. 

There are a few different types of paints that people often use for doing face paints.

The first is a simple crayon or pencil. I haven't tried these, but a youth group at my church does face paints every year at the Halloween party, and they seemed to think they were not as easy as paint, which makes sense to me:


You then have actual face paint:


My sister-in-law just uses normal old acrylic paint:


Try this out with your children! You can do it for any holiday, sporting event, or even just something fun to do along with your weekly theme.

Monday, October 17, 2011

Science Book


Little books are a great way to reinforce what a child has learned about a particular subject. Kaitlyn made this bat book at preschool. 

They learned all about bats. At the end of the unit, they each choose four things they knew about bats and colored a picture of each item on a page for this book. So Kaitlyn had that they slept in the day, had wings, is not a bird, and likes to eat nectar. The great thing is that she loves to look through it and tell me what each page is a picture of, so it helped reinforce as she made the book, and then helps over and over (and over) at home :) as she tells me about it (again). 

You could do this for any unit you are learning about. Bugs, animals, plants, machines, vehicles, space...it is endless. This is a great way to work science into your week.

LinkWithin

Related Posts with Thumbnails