Welcome!

This blog is here for you to find fun learning activities to do with your children. We share great ideas we find and love on the Internet, as well as ideas we come up with on our own! We also like to share resources we find helpful.

To find ideas for your child, click on the age range blog label or on the theme/topic you are looking for (on the left side of the page). In each post, we try to list optimal age ranges for the activity, but you must judge for yourself if it is appropriate for your child. When you try an activity out, please comment and let us (and everyone else) know how your child liked it!

Friday, January 20, 2012

Egg Carton Snowman


I had extra egg cartons (cardboard) from the grocery store and I was convinced that something fun could be done with them. I had an idea, but when Val posted the Puffy Paint snowman ( http://learningdevelopmentactivities.blogspot.com/2012/01/puffy-paint-snowman.html ), I knew that my idea just got a new twist!

Prep: Cut cardboard egg carton compartments out. They will stand up on their own, and they don't need to be pretty. :)
Make puffy paint (equal parts glue and shaving cream). I used 1/4 cup of each and it was WAY too much for 3 snowmen. Maybe try 1/8 cup (2 T) of each to start. I felt like I wasted a whole bunch of glue.
Gather supplies: paintbrushes, cut out carrot nose (construction paper), buttons, beads, wiggly eyes (or cut out of paper), small squares or circles for the mouth, ribbon for scarf, glitter. The decorations are optional, so go wild with what you have on hand. Oh, and you'll need toilet paper.

Directions:
I put down a coffee filter for them to paint on so it didn't get on the table. It's easy to clean up, so that part is not necessary.
Stuff one carton w/ toilet paper for stability. Paint with puffy paint.
Stuff 2nd carton with toilet paper (this allows for stacking like a snowman is built). Either paint in hand or while on the 1st carton.
Stuff 3rd carton (head). Paint. Decorate!! Allow to dry before moving. Should take about 12-24 hours to dry, depending on the amount of paint used.


Wednesday, January 18, 2012

Puffy Paint Snowman


My daughter made this in preschool and has been ever in love with it since.

This is made from puffy paint, which is simply equal parts shaving cream and white glue. You mix the two together and then paint with it, or glob it to make a nice snowman. 

She also used pieces of construction paper to create the eyes, noses, mouth, hat, and arms. Lay flat to dry. Once it is dry, you can touch it and feel is puffiness! Now she just wants it to have feet so it can walk around like Frosty :)

Monday, January 16, 2012

Surviving Winter: Story Time at the Library

image source
I think a huge secret to making it through the winter months and still being sane, happy, and even a bit improved is to get a change of scenery every so often. One way to do this is story time at your local library. How awesome is the local library? All that free stuff? 

Every library does story time differently. For some, it is a "come one, come all" thing where you just show up and get some stories read. My library requires you sign up ahead of time, but they do really neat things for the children with fun crafts, handouts, and treats. 

And not all storytimes are at the library. We have a non-profit center close to our home that focuses on the history of the American West. They do a free storytime weekly that is full of stories, games, crafts, and food, and it is come one, come all, no sign ups required. Learn about the resources you have around you by asking moms with older children, reading the papers, and checking websites. 

Storytime offers a love of reading along with a social outing that is low-pressure. This is a great winter, rainy day, or hot day activity!

Wednesday, January 11, 2012

Surviving Winter: Extra Book Reading


Part of combatting winter crazies is keeping the mind engaged. When you are stuck inside for longer hours than usual, reading extra books is a fun way to pass the time and engage the mind. Try adding an extra story session to your day at some point--maybe after breakfast or lunch or just before nap time. Chase the winter blues away with a pile of books.

Monday, January 9, 2012

Surviving Winter: Baking


My idea behind surviving through the winter months (with sanity, happiness, and fun) cooped up in the house is to find things that will keep my children so they don't feel the need to pull out every toy and game we own and to prevent bickering that can happen when people are bored. We have structured  days, but you need some free play. 

Baking is something that all three of my children love to do. The measuring, pouring, mixing...not only is there a lot to learn while baking (math, fine motor, life skills), there is a lot of time to talk. It is a great moment to bond and get to know your children a bit better. Plus, you get food made at the same time! Yum!

So do some baking this winter. Your tummy and your child will thank you for it.

Wednesday, January 4, 2012

Winter Books 2012

Time for some great winter books! These really are all must-haves in our home.

The Big Snow by Berta Hader and Elmer Hader

Caldecott winner of 1949. This is my four year old's favorite winter book right now. She is my major animal lover and this book is right up her lane as a story about the animals preparing for winter.


Snowmen at Night by Caralyn Buehner and Mark Buehner

This is a great story for sparking the imagination of children. What do snowmen do at night? Why do their shapes change over time? It must be that they are out playing with their friends.


The Snowman by Raymond Briggs

This is a total classic. It is a wordless picture book, which is great on so many levels. My two year old loves this for telling herself the story.


Here Comes Darrell by Leda Schubert

This has been a favorite of my six year old son's for several years. It is about Darrell and the various service he does for his neighbors. It isn't all about winter, but part of it is and it is definitely worth taking note of. Anyone who loves equipment like plows and tractors will love this book.


A Polar Bear Journey by Debbie S. Miller

This is another favorite of my animal-loving four year old. This book is factual and offers lots of information on polar bears told in a way that is interesting to children.

Wednesday, December 21, 2011

Fingerprint Christmas Lights

Meet the Dubiens is one of my favorite blogs.  I loved this post where she created fingerprint lights and decided it was just perfect for our Christmas cards.  J could be fully involved and love every minute of it (he did... of course I don't often bring out the finger paints so he was just thrilled).
And the best yet is they were free!  Or at least we already had all the materials necessary: cardstock blank cards, black sharpie, finger paints.

I drew the wire and small black squares to signifiy each light.  The J took over the fun part.  I was a little worried that he would decide to mix all the paint together which would mean we'd have a bunch of brown Christmas lights (not very festive!).  So I just gave him one color at a time and let him paint a few cards with that color before moving on.  That was just way too tedious and unnecessary.  He ended up doing just fine when I gave him all the colors at once. 

And here's our final product (ugh. can't get the photo to turn!)


I later added "Light has come into the world" (John 3:19) to the front of the cards, printed a picture to go inside and sent them on their way. We loved them!
Don't forget to check out the original at Meet the Dubiens.


Becca also blogs at Fun and Engaging Activities for Toddlers.

Top 5 Pinterest Christmas Finds

Now this is a hard task. There is no shortage of fun Christmas ideas out there. Here are my current five favorite for Christmas to give you some more ideas!

Nativity Pre-K Pack
from Over the Big Moon


This is a free printable that has several activities to do with a Nativity theme. Love this! We have used several of these pages so far.

Gingerbread Reindeer Cookies
from CakeCentral


This is super cute. These are gingerbread cutouts that are upside down and decorated as Rudolf!

M&M Wreath


This is on our list for this week. A great activity for working sorting, fine motor, and colors at the same time.

Footprint Christmas Tree


Is this not adorable?


Play Felt Tree & Ornaments


This is seriously an amazing idea. I love, love, love it. You could so easily make something similar for various holidays, too. Giant egg to decorate for Easter, Felt tree to decorate by season, turkey with various feathers...lots of possibilities.

You can find me on Pinterest here: https://pinterest.com/valplowman/

You can follow my Learning Ideas board here: https://pinterest.com/valplowman/learning-ideas/

And my Christmas board here: https://pinterest.com/valplowman/christmas/

Monday, December 19, 2011

Christmas Wreath Ornament


Kaitlyn brought this home from preschool last week and it was one of those things where I thought, "Why have I never thought of that?"

Supplies
  • green foam
  • red ribbon for bow
  • string for hanging
  • glue
  • desired decorations
  • scissors
Prep
  1. Gather supplies
  2. Cut out wreath (you can use straight scissors, but decorative scrapbooking scissors will add some character)
Activity
Have your child decorate as desired! A simple and cute ornament!

Wednesday, December 14, 2011

Gingerbread Number Activity


As I shared in my post on Monday, we just finished up a week on Gingerbread men. This was our number activity. I found this at this website also: http://www.pre-kpages.com/gingerbread/

I made this page by googling "Gingerbread man coloring page" and chose this simple gingerbread man. I then opened it in Photoshop and put numbers in it. You could do it in Word or other programs, also. Here is my copy you are free to use.

The activity is simple. You give your child a dice and something to mark with. You have your child roll and mark off each number as he gets it. My kids really enjoyed it!

For more of a challenge for older children, you could do larger numbers (7-12) and give them two die and have them add the numbers together.


Monday, December 12, 2011

Gingerbread Alphabet


We just finished up a fun week of Gingerbread activities. This was our alphabet activity. I got this idea from here: http://www.pre-kpages.com/gingerbread/. She had a free download of the pages, but it only had letters A-F, so I quickly made some of my own. You can download them here.

To prep this activity, I created the pages, printed them, then laminated pages and letters so they will hold up from year to year.


For my older children (4 and 6), I simply gave the child all of the gingerbread men pages and all of the letters (upper and lowercase) at the same time and told them to match them up. They put the upper and lowercase letters on the same man. This is something that helps them work on letter recognition and keeps them occupied for a good chunk of time. They don't need any assistance from you.


For my 2.5 year old, we did things differently. We did one sheet at a time. I gave her the upper and lowercase letters for the letters on that sheet. She could do the uppercase all by herself, so if you want a younger child to do this activity independently, you might want to just do uppercase letters. She needed help with the lowercase letters.

The way I helped her understand grouping the letters together even if they looked different is I told her the man on the page is the "daddy letter," the uppercase letter was the "mommy letter," and the lowercase letter was a "baby letter." This worked for her because she is obsessed with babies. It helped her grasp that the letters can go together even if they don't look the exact same.

I had her hold a letter up and tell me what letter it was, then match it. She could get all uppercase, and knew some lowercase, but didn't know them all. It was a great exercise in getting her to think about lowercase letters.

For younger toddlers, I would recommend doing just uppercase. For a pre-toddler or baby, you might hold the letter up and say what it is and then put it on the page or have your child put it on the page if possible.

Wednesday, December 7, 2011

Nativity Act Out


Every year around Christmas, we get together with the cousins and act out the Nativity. The children dress up very simply. We use towels, adult dress shirts, robes, ties, and scarves. We also use props like angel wings, stars, and crowns. 

The children each get a piece of a nativity set and dress up as that character. We then read the Christmas story from Luke. As the child's part is read, the child comes into the room and places his or her piece in the stable and stands in place. 

This is a very effective way to teach children the story of the nativity! You can apply the dressing up to any scripture story you want to focus on.


Monday, December 5, 2011

How I Do It: Learning Time


On one of my other blogs, I have been doing a series on how I do various things in my day. Here is my post on how I do learning time. I thought it was appropriate here :)

Learning time at our house is something that has definitely grown over the years. I remember talking to one of my very best friends when Brayden was two. She was a school teacher before becoming a mom (a very good one), and we have been friends since elementary, so she knows me well. We were talking about what Brayden knew and didn't and I expressed that he couldn't do something all the way yet, and she laughed and said it was a 3 year old skill and not to worry about it. She commented that he would of course be fine because of all that I did with him. I told her I didn't do anything beyond normal stuff you do with children. She then listed off all of these things I did with him daily that helped him learn--things I had never thought of as teaching him, just things you did with kids. One example is reading with him each day.

Two days ago, my sister-in-law was asking me how I structure learning time and she commented that she should have started long ago with her oldest (who is two). I assured her she was fine. I didn't start formal learning time with Brayden until I was pregnant with McKenna, so he was 3. 

I share that with you to impress upon you that learning time does not need to be formal and I also don't want this post to cause you stress about not having done something with your child yet. This is how I do learning time right now, but not how I did it 5 years ago. Don't underestimate the power of playing with, reading to, and working beside your child. If you want to add more formal setting for your child, this can be a great structured playtime slot in your day. Here is how I do it.

Organize Your Stuff
An important step to having successful learning time with your child is to organize your actual stuff. You'll have paints, crayons, paper, sequins, string, saved paper towel rolls...lots of stuff. You need somewehre to put it. There are tons and tons of different ways to do this. Some people can have an actual room that is used for learning activities in their home. In it, they can have drawers, closets, shelves, etc. full of their items.

Other people (like me) do not have a room dedicated to a toy room and/or learning room. We do our crafty stuff in the kitchen for the most part. I have our items organized into totes. I then have these totes primarily in the office closet, which is close to the kitchen. I used to keep the items all downstairs in a nice big closet. Space-wise, it worked great. But proximity wise, it was annoying to me. I didn't like going all the way downstairs each day for our learning stuff (I know, my life is so hard--sense sarcastic tone). But it was annoying enough that I would put off doing learning activities. So I recommend you keep your items as close to where you will do your activities as possible. Here is the section of my closet in my office for the learning items:


I also recently dedicated a drawer in my kitchen to learning items. We have all of our crayons, pencils, pens, markers, etc. in it. My children all love to color, so I can grab a paper and hand them crayons to keep them occupied at the bar while I make dinner. 

I keep all of my laminated items for my learning poster I describe below (letters, numbers, shapes, calendar items, etc.) in envelopes:


And I keep those envelopes in an accordion file organizer:

I also keep anything that can fit in there that has to do with learning stuff :)

Here are some more organization ideas:


Think of Learning Ideas
Another important step to doing learning activities is to think of ideas to do :) This is such an easy step in our modern world. There are fun books out that give you ideas (The Toddler's Busy BookPreschooler's Busy Book, and The Siblings' Busy Book). There is also an untold number of blogs in the Internet that give you ideas (I will of course plug the one I write with a few other moms: Children's Learning Activities). As you do these regularly, you will find that you start to come up with your own fun ideas of things to do!


Plan Your Week
I think you will get the most from your time spent if you plan out your week ahead of time. I really like to do a theme each week. I got into this habit in following the curriculum on this blog: http://www.ourpreschoolhomeschool.blogspot.com/.

I loved the set-up and we have continued this way while creating our own themes and ideas. Each week, I pick a theme, vocabulary word, nursery rhyme, letter, shape, color, number, and scripture to focus on. Then I plan my activities around those ideas. In addition to activities that teach those items, I try to do sensory, gross motor, fine motor, sorting and matching, and science. We also read books that are related to our theme. This might sound super over-whelming, but a lot of these can be combined with each other. If it all seems like too much, just start small and work your way up.

I use one of two different documents I have made for planning. This one is detailed and has one week per page. This one is my quick planning sheet. I use this one most of the time. It has two weeks per page on it.

Once I have the week's activities planned, I make a list of things to do to prep for our activities. For example, we recently did a week on Thanksgiving. One project we did was a Mayflower shape picture. To prepare for this, I created the shapes to use in the picture. 

I then make a list of things I need to buy to do any of our activities. 

Prepare for Activities
Now that you have everything planned, you need to prepare. I find this is easiest to do all ahead of time. I take a couple of hours (ideally the Friday or Saturday before the next week starts, but sometimes I am doing it on Monday of the week we are doing the theme) to prep everything. I print my learning poster items, make sure the calendar is ready, and prep activities. 

I also need to go shopping sometimes to get some things to do activities. 

I also prepare my Face-out Book Shelves. I put the books that go with our theme on the shelves. If I have extra space on my shelves, I put other books I want to encourage the children to read at the time.

Do the Activities
Now is the execution. We used to always do this in the morning hours, but right now I do not have a consistent or ideal time to do it. My problem is I want Kaitlyn involved in it all, but that is rather silly becaus she is at preschool three days a week. So yesterday I decided I need to have a set time and on certain days, she just wont be around. But there are some activities I know the older kids (Brayden and Kaitlyn) will just love so we do it after Brayden gets home from school.

Here is our process.

  1. We start with our Learning Poster. See this post for more on it. We discuss our theme and the vocabulary word. We then recite the nursery rhyme. We then talk about the letter, the sound it makes, and words that start with that letter. We then do the color and shape. We finish up the poster with our number of the week. We count to that number. I have printed (and laminated) a picture of each. On Monday, we put each item in place as we go along. 
  2. We then do our Calendar. See this post for more information about our calendar. We say the day (Friday), the month (December), and the date (second), with the year (2011). We put the number for the day on the calendar. We then talk about the weather outside and put up the appropriate picture. We then read and recite our scripture.
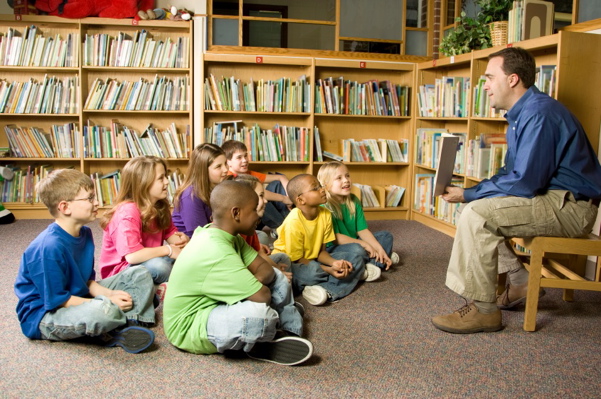
  3. We read a story. We pick a story that coincides with our theme for the week and read it.
  4. We do our activity(s). Sometimes, we move right into this. Other times, we wait until after lunch or after Brayden is home from school. 
Aftermath
One thing I recommend is that you take a picture of the creation right away. That way, you can either save the best and you have a photo before it is smashed OR you can throw it away after you have displayed it for a while. You can't save everything. 

I always hang my children's latest up on our refrigerator. They love to see it up there. So find somewhere in your home you can display your children's artwork. I have more ideas in my head for this...hopefully it will come to pass so I can share.

Conclusion
If you want to do a learning time each day but this all seems overwhelming, it is okay to start small. We we first started, we just did the learning poster side of things without an extra activity. Make this work for your family. 

I would love to hear how you do it! How do you organize? How do you plan and prepare? How do you execute?

LinkWithin

Related Posts with Thumbnails