Welcome!

This blog is here for you to find fun learning activities to do with your children. We share great ideas we find and love on the Internet, as well as ideas we come up with on our own! We also like to share resources we find helpful.

To find ideas for your child, click on the age range blog label or on the theme/topic you are looking for (on the left side of the page). In each post, we try to list optimal age ranges for the activity, but you must judge for yourself if it is appropriate for your child. When you try an activity out, please comment and let us (and everyone else) know how your child liked it!
Showing posts with label baking/cooking. Show all posts

Monday, January 9, 2012

Surviving Winter: Baking


My idea behind surviving through the winter months (with sanity, happiness, and fun) cooped up in the house is to find things that will keep my children so they don't feel the need to pull out every toy and game we own and to prevent bickering that can happen when people are bored. We have structured  days, but you need some free play. 

Baking is something that all three of my children love to do. The measuring, pouring, mixing...not only is there a lot to learn while baking (math, fine motor, life skills), there is a lot of time to talk. It is a great moment to bond and get to know your children a bit better. Plus, you get food made at the same time! Yum!

So do some baking this winter. Your tummy and your child will thank you for it.

Thursday, November 17, 2011

Pilgrim Cookies

 
I saw these pilgrim hat cookies and thought they were adorable and something even a toddler could accomplish. I did make a few quick changes from the original I saw here. Their cookies were more accurate and cuter, but a few changes meant J could be that much more involved (and truth be told, I don’t think I could’ve iced a buckle so small).
We used yellow Reeces Pieces for the buckle instead of the yellow icing and I went with a chocolate covered cookie instead of the ginger snaps (because I don’t like ginger snaps so much!). I did try cutting a marshmallow for the white band around the middle, thinking J could create every part. I couldn’t get the marshmallow to look right, so I scrapped that. Maybe someone else has good luck with it though.
TO MAKE:
You need:
  • small brown cookies (I used Archer Farms “Dark Chocolate & Caramel indulgent cookies from Target, just 8 in the box, so good for a small group)
  • Small Reeces Peanut Butter Cups
  • Yellow Reeces Pieces (or M&Ms)
  • White icing
What you do:
  • Squeeze a drop of icing onto the center of the cookie. Stack the Reeces Peanut Butter Cup on top (upside down). Line the base of the RPC with white icing. Use the icing to “glue” the yellow Reeces Pieces on as a buckle.
These cookies were really good and REALLY rich (dark chocolate caramel cookie with Reeces Pieces AND Reeces peanut butter cup…. not really part of any diet). Last year J and I gathered all his cousins to work on these the morning of Thanksgiving.  They gave them a part in preparing the meal (the best part of the meal… dessert!). Everyone loved them.
They have the side benefit of providing the opportunity talk about the origin of Thanksgiving. I used it as a review of who the pilgrims were.

Becca also blogs at Fun & Engaging Activities for Toddlers.

Tuesday, October 25, 2011

Halloween Recipes


DearlyDomestic.com has some great Halloween recipes posted, including this one for Candy Corn Pudding. Looks like I need to add Cool Whip to my shopping list for this weekend. This may be perfect for our Trick-or-Treat get together for all the kiddos to snack on!

It also looks easy enough for the kids to help put together, too!


Candy Corn Pudding

*2 Large Boxes of Vanilla Instant Pudding

*Yellow and Orange Food Coloring

*Cool Whip

*Candy Corn


Make pudding according to directions on box. Separate finished pudding into 2 separate bowls evenly. Color w/ food coloring. Top w/ a layer of Cool Whip and candy corn! Enjoy!!

Thursday, October 13, 2011

Baked Apples with Cranberries

This is cooking project we did after apple picking last year. I found the recipe in the mail from my grocery store and knew it was something J could do with me. I had all the ingredients, so we could do it right away!
Baked Apples with Cranberries
1. Preheat oven to 375*F. Core the apples, leaving the bottom closed (creating a small bowl in the apple). Peel the top half of the apple.
2. Fill the apple with dried cranberries (I used frozen and it was fine).
3. Top with a spoon of brown sugar, 1/2 tsp of butter and sprinkle with cinammon.
4. Bake for 35-45 minutes (until the apples are soft).
J helped with steps 2 and 3 and then of course helped with eating. This was a simple cooking project for him. You can make just one or a dozen. I really decided to do this last minute because I had all the ingredients, no planning required.
stuffed-apple I forgot to take end result pictures of my own, this is from Nicola’s Blog (ours did not look so pretty anyway!)

This would be a good recipe for any age toddler, even the youngest could manage this. Preschoolers could accomplish it mostly on their own. You could create a picture list for them to follow on their own. All ingredients are safe for taste sampling if they get distracted while “cooking” and if they were to add more than the actual recipe called for, no harm done. Use a spoon or tongs for adding the cranberries and you’ve included some fine motor skill practice.


Becca also blogs at Fun and Engaging Activities for Toddlers

Monday, July 25, 2011

Freezer Jam


I was talking with Raegan the other day about Brayden and I making freezer jam and how much value there is for children in making it. She was interested in the recipe, so I thought I should share it with all of you.

If you have tons of fruit you don't know what to do with, freezer jam is a great way to go. It is so delicious! If you have never had it, you must try it. This is the best jam ever. You can make several kinds. My favorites are peach, strawberry, blackberry, and best of all raspberry. You can also combine those for new flavors.

It is easy enough to make with a toddler. One thing, though, is that it does take about an hour to make total, which I think is too long to hold a child's interest. The reason is for 30 minutes you just stir it every five minutes. So you might want to have your child help up to the stirring and then have him do something different or off to nap time or something. 

Here are the supplies you need:
  • Pectin. This is the most important ingredient for you. I find it in my grocery store by the canning supplies, but I don't know if stores outside of Utah will really have this and if so, where in the store. So I found the kind I get on Amazon for you: MCP Premium Fruit PectinIt has the instructions in it, so buy the box and then you have the instructions. But I will tell you what else you need.
  • Sugar--lots of sugar. I think it is about 4-5 cups for each recipe.
  • Corn Syrup
  • Lemon juice (bottled is fine)
  • Fruit. Usually about 3-5 smashed cups. 
  • Potato smasher
  • Spoon
  • Bowel
  • Measuring cups
  • Containers for jam. You can use something as simple as the disposable tupperware made by Ziploc, Rubbermaid, etc. You can also use glass jars that can be frozen. I use jars from Kerr that look like the one below. Make sure if you buy glass, it says freezer safe. Ball is also a good brand for jars.

Let your child help as much as you think is appropriate. They can wash berries and smash the fruit with the potato smasher. I let Brayden use a plastic knife to cut the greens off of the strawberries.

A note, make sure you don't smash the fruit too much. You want your jam to be chunky, and while you are stirring the jam over and over, the fruit chunks will break down even more.

You can store your jam for at least a year. The instructions say one year, but most of us who do it will keep it longer than that.


Friday, April 22, 2011

Healthy Cookies...yes, you read that right!


When you have kiddos, the temptation (at least for me) to make fun treats all the time is overwhelming. I love any kind of cooking with my kids, but baking without always making something that'll end up calling my name to finish once the kids are in bed...is really tough.

So I ran across this cookie recipe on a great website where the only questionable item in the recipe is dark chocolate (70%), I jumped on it! No sugar, no eggs, no white flour (no flour at all)!

Ingredients:
*3 large ripe bananas


*1 tsp vanilla


*1/4 cup coconut oil, warmed so it isn't solid (or substitute olive oil)


*2 cups rolled oats


*2/3 cup almond meal (I get this at Trader Joe's. Or you can make your own by pulsing almonds in the food processor until it's a sandy texture. Just don't over process, or you'll get almond butter)


*1/3 cup unsweetened coconut, shredded


*1/2 tsp cinnamon


*1/2 tsp salt


*1 tsp baking powder


*6-7 oz. chocolate chips or chopped dark chocolate bar


Oven to 350*


Combine bananas, coconut oil, and vanilla in large bowl. In another bowl, mix almond meal, oats, coconut, cinnamon, salt, baking powder. Add dry ingredients to the wet and combine. Fold in chocolate. The dough is looser than regular cookie dough...it's fine!!! Drop spoonfuls on to parchment, Silpat, or baking stone. Bake 12-14 minutes. The recipe said that just shy of 15 minutes was perfect for them. I got the same results...perfect at almost 15 minutes. Just don't burn the bottoms.


I prefer them warm, but they are good any way you serve them! Enjoy! A fun one to make with the kids!


Monday, April 18, 2011

Easter Cupcakes


Here is a simple, fun treat to make with your children at Easter. If you let your children help with the whole process, you will work on math skills, cooking skills, colors, and fine motor skills.

Supplies
  • Cupcakes (either make from box or mix your own)
  • Cupcake paper cups
  • White frosting (buy made or make your own)
  • Optional: coconut
  • Green food coloring
  • Candy eggs (robin eggs, jelly beans, etc.)
  • Optional: licorice for a basket handle
Method
  1. Make the cupcakes. Be sure to let your children help add ingredients and mix the batter. Also, be sure to talk about the math involved on your child's level, whether on simple counting (one egg, two cups of flour, etc.), addition (we need three eggs. I have one, how many more do we need?), subtraction (we need three eggs, I added two, now how many more do we need?), or fractions (focus on the 1/4 cup of oil and such). 
  2. Bake cupcakes and let cool completely. You might want to bake one day and then decorate the next, or bake in the morning and decorate after dinner.
  3. After making the cupcakes, make your frosting. If you are making your own, you can add the math benefits here, too. You can also point out the changes that come to your frosting as you add liquids and as you add solids (it is thick, let's add some more milk. Ooohhh, look what happens! OR It is runny, we better add some more powdered sugar).

    Once the frosting is made, it is time to add your green food coloring and see what happens.
  4. OPTIONAL: You can dye coconut green to give more of a grass texture (or dye it other colors if you want to). My children don't like coconut, so we didn't do this.
  5. Next, you decorate your cupcakes! Let your children use a butter knife to spread the frosting on their cupcake. Then let them decorate with coconut and eggs. This creates a cupcake that looks like eggs in grass. You can also add a licorice stick from one side to the other to be a handle and you suddenly have an Easter basket with eggs instead! I plan do this version this year (photos are from last year), so I will post pics as I get them.


Tuesday, October 19, 2010

Making the Old New Again

Do you have any toys that you don't want to get rid of, but have been sitting stationary in your house for a while? Our play kitchen was like that.
The girls seemed to be on a hiatus from playing with this kitchen. One beautiful day, my 3 year old herself had a brilliant idea. "Wouldn't it be fun to take the kitchen outside? I can cook outside, like Daddy does on the grill!" Genius!!! Per her request and to her sister's delight, I loaded her up with some fun "mommy stuff" to cook with...extra flour, some random spices, sprinkles, etc. She had so much fun making a normally not allowed and extremely large mess. :) Oh, how I love cleaning up with a garden hose. Ignore the extension cord...husband was doing some yard work while they played happily.
Atalie was not too fond of Charis's creation, but sampled it multiple times anyways. :) Muffin tins, a washable mess, and happy kiddos.
Take a look around your house today! What toy would be more fun or made new again by just a different environment? Grocery cart? Baby stroller? Tea set? Have a party with stuffed animals? Picnic outside (don't worry, the ants will clean up your crumbs)? Even a doll house or trucks and cars?


Monday, October 18, 2010

Jack-O-Lantern Pancakes


My husband made these pancakes for us, and I just had to share them. The kids loved eating them. 

First, you make some pancake batter. Put a small amount in one bowl (for the green) and the rest in another bowl. Dye the small amount green and the large amount orange.

Heat a skillet.

Put the green of the pumpkin on first. Do the eyes, the stem, and the mouth. My husband used a fork and drizzled it on there.


Then pour the orange around the green.


Cook and serve! A fun, festive breakfast. Our kids waited a while before eating them because they liked looking at them :)

Monday, October 11, 2010

Peanut Butter Pumpkins


This is a tasty treat that is easy to make. I found it in the Big Book of Halloween.

Skills Developed:
  • Math skills
  • Color skills
  • Fine motor skills


Ingredients:
  • 1 stick of butter
  • 12 oz jar of peanut butter
  • 16 oz powdered sugar--sifted
  • Red and yellow food coloring
  • Green icing
Supplies:
  • Large bowl
  • Wooden spoon (but I used beaters, and wish I had just used my Bosche mixer)\
  • Toothpick
  • Sifter
Method:
  1. Melt butter
  2. Pour butter in large bowl
  3. Add several drops of food coloring to make orange. 2 drops of red and 3 drops of yellow will make orange, but I had to do that several times before everything was truly orange. 
  4. Add peanut butter.
  5. Add powdered sugar (sifted).
  6. Mix until a dough like consistency is reached.
  7. Shape dough into small balls. 
  8. Make ridges using a toothpick. Don't scratch them in. Just press the toothpick into the balls.
  9. Add a small amount of green icing on the top of each pumpkin for a stem.


Note: See the bowl in this picture? Not a large bowl. I ended up moving everything into a large bowl.

Tuesday, August 17, 2010

A week (or more) of Grizzly Bears!

On Friday I posted a synopsis of how I come up with a week of lessons on different topics. This is what I decided to cover/review this week:
Theme: Bears
Vocab word: hibernate
Nursery Rhyme: Teddy Bear, Teddy Bear
Number:5
Color: Brown
Fiction Story: Goldilocks and the Three Bears
Letter/sound: Bb
Math skills covered: counting, sorting, graphing
Gross Motor: Crawling like a bear for Hide-and-seek
Life Skill: manners

Day 1:
We started off the week reading a book, starting with the non-fiction book I'd chosen. (I'd checked out both a fiction and non-fiction book about bears. My fiction choice was Goldilocks and the Three Bears. ) We read the book very slowly, going over each detail. We talked about what they eat, where they live, hibernation, homes, coverings and other physical features, and habits. I taught her the rhyme "Teddy Bear, Teddy Bear". We counted to 5.

Following this activity we learned about the letter B. I'd printed off a few different B activities from First School to make it a little easier to start. I let her glue buttons to the B on the first page.


Day 2:

We reread the non-fiction book about Grizzly bears. This time I asked her questions as I read, like "What do bears do when winter comes? Do bears like to be alone?" etc. Then we did another "Bb" paper.
Review rhyme and #5.

Math/Snack: I bought a box of Teddy Grahams and would hand her a small pile. I then asked to her count how many I'd given her. It's great practice to move the bears as they count to keep from counting the same bears over and over. At the end she got to eat a few.


Day 3: Reread non-fiction. Read Goldilocks and the Three Bears. Make the letter B with Do-A-Dot markers.


Math: I printed off a gummy bear graph and she sorted gummy bears by color and then graphed them. (and then eat some, of course!)

We practiced making the letter Bb and making circles, our shape of the week. We then used pre-cut circles to make a bear face, like shown on this site. I just made my own template. Then she sponge painted it brown.

Day 4: Review Teddy Bear, Teddy Bear. Count to 5.

We made bear paws for breakfast. I confess that I know that grizzly bears have 5 toes, but they look better w/ 4 when you bake them. :) So, some have 5 and some have 4. Bear paws: refrigerated biscuit dough, roll into the paw shape, sprinkle with cinnamon and sugar, bake as directed. Easy!


We made bear ears (headband and taped on construction paper ears) and played hide-and-seek w/ berries and bugs (play food and plastic bugs). She had to walk like a bear and dig for her bugs. This is a great activity to do at night as a family. Her dad really got into it and made a little den for her. The growls and grunts were adorable. Even my 18 month old wore bear ears and played.

Math: Sort teddy grahams into piles of 5, since 5 (the # of claws on a paw) was our number of the week.

Reread Goldilocks and talked about manners.
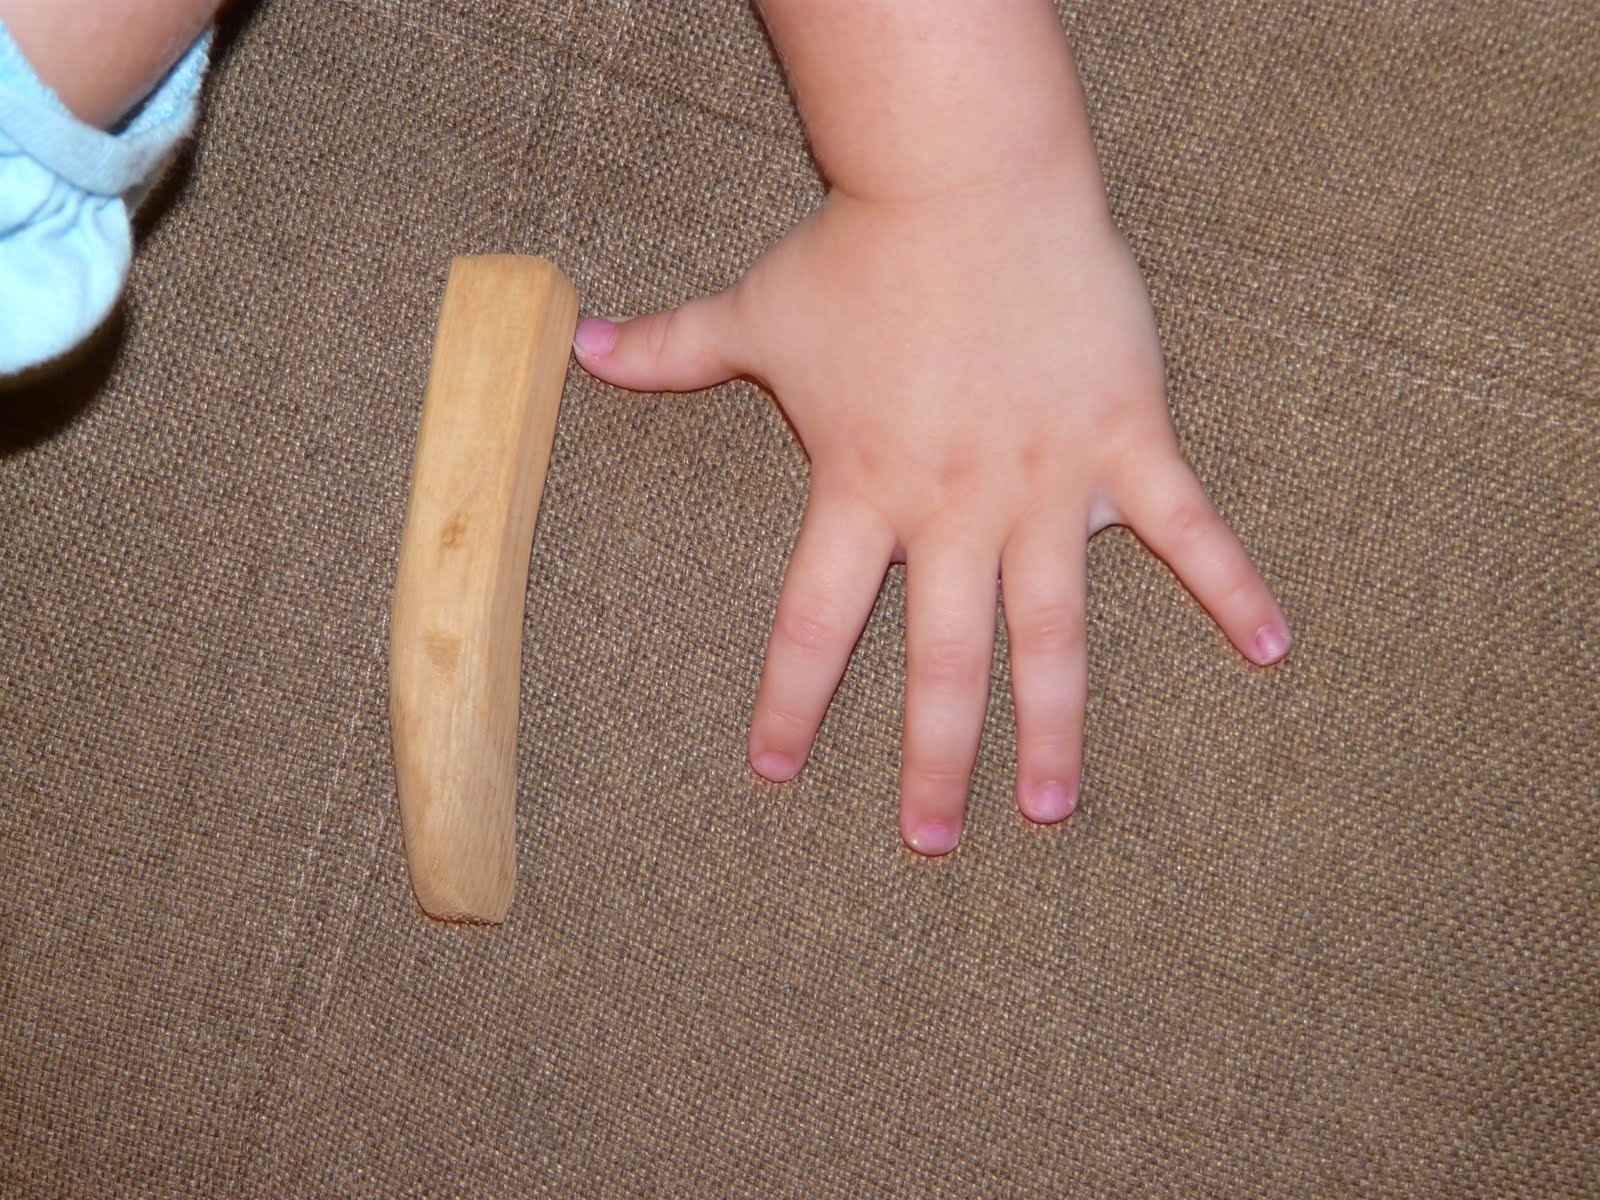
Day 5: Dad got really into the bear talks, too. So while at work her made her a bear claw (life sized) out of wood. Now when she plays hide-and-seek as a bear, she wears her ears and her claw. :)

Oh, and I made porridge for breakfast. Yum! Both girls cleaned their plates. Charis wanted to go for a walk to let it cool, true to story.
As a review, I printed off a bunch of bear pictures from Google Images and typed in what I needed (bear hibernating, bear catching salmon, bear paw with claws, etc). We made her own bear book with easy to read sentences so she can "read" it on her own.
EX:

Bears have big claws.
Our sentences included things like: Bears eat fish. Bears eat rabbits. Bears eat plants. This is a bear cub. Bears hibernate (one sentence per page).
We made the book out of construction paper and just stapled it together.

Hope that helps! Have fun teaching and learning about bears together! I just wish our zoo had bears...it would have rounded out a good week perfectly!

Wednesday, August 11, 2010

Simple Summer Fun: Popsicles


Making Popsicles is so simple, yet fun for the kids. They get to mix up this powder into a liquid, followed by time in the freezer and it comes out this solid piece of goodness. What's not to love?!?!? Here is a simple recipe I have for Popsicles:

Ingredients:
  • one package Kool-Aid
  • one package Jell-O
  • 1 1/4 cup sugar
  • 3/4 cup hot water
  • 3/4 cup cold water
Supplies:
  • 2 bowls
  • Spoon
  • Popsicle Molds
  • Optional: funnel. I like to use it, but it isn't necessary
Method:
  1. Mix dry ingredients in a bowl
  2. Measure 6 T of the dry ingredients into another bowl. Add the hot water. Add the cold water.
  3. Pour the into Popsicle molds and freeze.
  4. Store the remaining dry ingredients in an airtight container to use in the future. You could probably make Popsicles all summer from this one mix.
Again, no picture. I have a picture on my camera, but I can't use it because my computer is still out. Now the hard drive is dying...sigh. But I do like how the picture I pulled off the Internet has pictures of fruit in the background...that is a bit misleading, right? Maybe not for them, but it is for us!

Tuesday, July 6, 2010

A New Way to Make S'Mores!!!


I found the cutest activity in Disney's Family Fun Magazine (April 2008)! It's so hot here today...and it's supposed to get worse as the week goes on. I've been waiting for a way-too-hot spell to try it, and this is the week!

S'mores are probably my favorite summer treat, with or without the campfire. I make them in the oven, you can grill 'em, but this new way is completely safe for the munchkins. Introducing....

SOLAR S'MORES!
Here's what you'll need:
  • Pizza Box
  • Pencil and ruler
  • Craft Knife
  • Aluminum Foil
  • Scissors
  • Glue Stick
  • Black Construction Paper
  • Clear plastic packing tape
  • Clear plastic (like sheet protectors, laminating paper, etc)
  • Graham Crackers, chocolate bars, marshmallows
  • Stick or dowel

Next:

  1. Adults: On the top of the pizza box, draw a square that is an inch smaller than the lid all the way around. Use the craft knife to cut through the cardboard along three sides, as shown, and then fold the cardboard up along the uncut line to form a flap.

  1. Kids can help: Glue aluminum foil, shiny side out, to the bottom of the flap, keeping it as wrinkle free as you can.
  2. Glue another piece of foil to the inside bottom of the box and then tape black paper on the top of the foil.
  3. Tape clear plastic to the underside of the lid to seal the opening created by the flap. For the best results, the seal should be as airtight as possible.
  4. Place your "oven" outdoors in direct sunlight with the flap opened toward the sum, For each s'more, center two graham crackers on the construction paper. Top one with chocolate and the other with a marshmallow. Close the box and then use a stick or dowel to prop the flap open at the angle that reflects the most sunlight into the box (check periodically to adjust the angle). Within an hour (or sooner if it's a really hot day), the chocolate squares and marshmallows should melt enough to assemble into s'mores.

If you try it, let me know how it goes. It's also a good excuse to order out pizza for dinner. :)

Friday, July 2, 2010

July 4th: Books, craft, and snack

Add Image
We started learning about the flag by reading two books: The Starry, Stripy Blanket and The Star-Spangled Banner. We talked about how many stars and stripes are found on the flag, what the flag used to look like, and a little about the history of the flag.

Next, I gave my daughter a rectangular pieces of white paper, 7 red stripes, a glue bottle, and a smaller blue rectangle. I taught her how to use the glue bottle to put small dots of glue rather than squeezing hard to make large blobs. She did a great job! My 1 year old used a glue stick instead. After gluing down the stripes, she glued on the blue rectangle and a few silver stars. You could use white paint and a cotton swab, star stickers, or for my 1 year old, I just left it blank.


To finish it off, we made a somewhat healthy snack. I cut strawberries up into matchsticks, covered a graham cracker with cream cheese. As you can see, the blue is made of blueberries. If you don't have that, use what's around, like white icing, Twizzlers, jelly beans, sprinkles, Skittles.

Yum! Happy Fourth of July!! Have a great weekend!

Tuesday, May 4, 2010

Mmmm...Spinach!

As many of you may have guessed, one of my favorite things to do is cook with my daughters. I love it, and so do they!
Today we made lunch together. Both loved it, and spinach was part of the process! No scrunched up noses, picking leaves out, or refusals. Success!

(I wanted to take a picture, but I needed both hands to directing the slopping of pizza sauce and cheese.)

Twirly Whirly Pizzas (from Parents magazine)-- These pizzas end up looking like little cinnamon rolls.

Ingredients: pizza dough (homemade or refrigerated), pizza sauce (or marinara or leftover spaghetti sauce), fresh spinach leaves, mozzerella cheese (or whatever you have in the pantry).

Steps:
  • Roll out the dough into a large rectangle on a floured surface. Hard to make a mistake, so you can let your munchkin help.
  • Spread sauce over the dough.
  • Top with cheese.
  • Top with spinach.
  • From the short side, roll into a tube shape.
  • Cut into 8 pieces and put in a greased pie pan. Top with more cheese.
  • Cook on 400 for 20-22 minutes.

If you want to see a picture of what it'll look like, click here.

This is a great way to get your kids involved in cooking and trying new foods. My daughter, apparently frightened by anything green these days, was eating raw spinach leaves as we cooked.

Friday, April 23, 2010

Hands On Fun : PB & J Cookies


Peanut butter and jelly has to be one of my daughter's favorite foods. She's been known to eat 3.5 sandwiches at a time...seriously. I found this recipe and we really enjoyed making these. I think scoping the jelly was her favorite part. Well, besides the eating. This is a a great cooking activity to get your little ones involved , gaining hand strength (rolling, stirring), following directions, and great one-on-one (or two on one...however many kiddos you involve in this one) time for you and your munchkins.
PB&J Thumbprints (recipe from Martha Stewart)


Ingredients:


  • 1 1/4 cups flour

  • 1/2 tsp baking powder

  • 1/2 tsp baking soda

  • 1/2 tsp salt

  • 3/4 cup smooth peanut butter

  • 1 stick butter, softened

  • 1/3 cup packed light brown sugar

  • 1/3 cup granulated sugar, plus more for rolling

  • 1 egg

  • 1 tsp vanilla

  • 1/2 cup raspberry jam
Directions:

Preheat oven to 350. Whisk together flour, baking soda, baking powder, and salt. Beat PB and butter together until smooth (I used a mixer). Add sugars. Beat until pale and fluffy. Add egg and vanilla. Beat until incorporated. Reduce speed to low. Add dry ingredients and mix until combined.


Scoop level tablespoons and roll into balls. Roll each ball in the granulated sugar and transfer to parchment lined baking sheets about 2 inches apart (I used my Pampered Chef baking stone without the parchment).
(This is where my daughter loves to wash the dishes to help clean up!)

Bake until puffy, about 10 minutes. Remove from oven and use end of a wooden spoon to make indentions. Return to oven and cook 6-7 minutes more, until golden brown on edges. Transfer to wire racks and let cool completely.
.
Heat jelly/jam in small saucepan just until loose, about 30 seconds. Scoop into cookie indentions! Enjoy!

Wednesday, April 7, 2010

Cupcake Letters


This is a fun and tasty way to teach your children about letters and reading words.

AGE RANGE:
You can do this as soon as you want your child eating cupcakes.

SKILLS TAUGHT:
This activity focuses on letters. You can make it as simple as letter recognition on up to spelling and reading words.

If you want to include your child in making the cupcakes, you can also turn this into a math and baking learning activity.

SUPPLIES:
  • Cupcakes (from scratch or from a box)
  • Frosting (from scratch or from a can)
  • Ability to write letters on the cupcake using frosting. I used a cake decorating tip. If you don't have one, you can try putting frosting in a baggie, cutting one corer, and squeezing it out.
PREP:
  • Make cupcakes
  • Make frosting if needed
  • Write letters on cupcakes
ACTIVITY:
There are lots of possibilities for this activity. For the Baby/Pre-Toddler crowd, you can simply show your child the letter on the cupcake and say the letter along with the sound it makes.

For the Toddlers, you can do the same as for the baby/pre-toddlers, but as your child starts to know the letters, ask her what letter it is. Some toddlers will also be able to tell you the sound of the letter.

For Preschoolers, do the same as above, but quizing the letter and sound it makes. As appropriate, you can make words. Put the C, the A, and the T together and help your child read it. Then remove the T and put an R in its place.

You could also spell your child's name and show him what that looks like.

When learning time is over, eat the cupcake if desired.

Friday, March 5, 2010

Marshmallow Sculptures

Looking for something do do with all those leftover marshmallows besides make 100 cups of hot chocolate or rice crispy treats?


Materials:

Marshmallows (large and/or small) OR gumdrops

Toothpicks and/or straws


I think the gumdrops work better for tall structures. For ease of use, marshmallows are good.


Activity: See what kind of structures you both can build together using the materials you chose. Can you build something tall, like a castle? Letters? Numbers? Shapes?


This is a fun way to let them be creative and let their imaginations run wild. It's also fun to knock over. :)

*Helpful hint for those with children that will eat themselves sick (Raises hand!): Fill a small bowl up with the amount of treats they are allowed to eat while they build. It's not so much fun if you know you can't sample! We call ours the "Tasting Bowl." (Genius, I know.)

Tuesday, February 23, 2010

Marshmallow Snowmen


Materials: Large marshmallows, pretzel sticks (or toothpicks), mini chocolate chips or raisins, craisins (something for the nose), fruit leather/fruit roll-up/pull-and-peel licorice for the scarf, marshmallow fluff (for "glue").


Directions: I built one first to show my daughter how to do it. Take one marshmallow and stick a pretzel in it. Some of the pretzel will still be sticking out. Take another marshmallow and stick it on the pretzel piece sticking up. You now have 2 marshmallows stacked. Stick another pretzel stick in the 2nd marshmallow and add the 3rd marshmallow on top.


Add 2 pretzel sticks for arms.


Twist around whatever you decided to use for the scarf. They'll need help with this!


I let my daughter use a pretzel stick to smear on some marshmallow fluff (we used ricemallow creme) on the face or on the individual chips. The chocolate chips/raisins/craisins will all stick to it and you won't be able to see the fluff since it's also white. :)


Ta-da!


Then eat! Yum.


Skills: fine motor, hand-eye coordination, hand strength, building and stacking, self-control not to eat :)

Friday, February 19, 2010

Defrosty the Snowman


Snow melting? Ours is! Instead of mourning, we're celebrating! Everyday Fun magazine had this cute idea last winter, and I thought I'd share it with you!
What you'll need:
-White candy melts (one 14-ounce package makes 16 snowmen)
-Miniature chocolate chips
-Light cocoa candy melts
-Rolos
-Candy corn (I used a piece of a real carrot for lack of candy corn)
Here's the directions they give:
For each snowman, you'll need 6 mini chocolate chips, a light cocoa candy melt, and a Rolo. To make the nose, cut the orange section from a candy corn, then slice it in half lengthwise. Roll the piece between your fingers to form a carrot shape.
To assemble your snowman, melt the white candy in a bowl according to the package instructions, then scoop a rounded tablespoon onto a sheet of wax paper. With the back of a spoon, smear the candy into a puddle. Working quickly, stick on the light cocoa candy melt, add a dot of white melted candy, then place the Rolo on top. Finally, add the candy corn nose and mini chocolate chip eyes and mouth.
Have fun!

LinkWithin

Related Posts with Thumbnails