Welcome!

This blog is here for you to find fun learning activities to do with your children. We share great ideas we find and love on the Internet, as well as ideas we come up with on our own! We also like to share resources we find helpful.

To find ideas for your child, click on the age range blog label or on the theme/topic you are looking for (on the left side of the page). In each post, we try to list optimal age ranges for the activity, but you must judge for yourself if it is appropriate for your child. When you try an activity out, please comment and let us (and everyone else) know how your child liked it!

Monday, February 28, 2011

Surviving Winter: Dress Up and Imaginative Play


Dress up and imaginative play are fun any time of year, but they are a great way to pass the time while stuck inside. Dress up and have fun!

Acquiring dress up clothes does not need to be expensive--though I do think in most cases it will take you time to build it up. One way to get inexpensive dress-up clothes is to shop the sales right after Halloween. Even pre-sales--a lot of Halloween costumes will be cheaper than it is to buy "dress-up" clothes.

The crafty among you can sew and make dress up items.

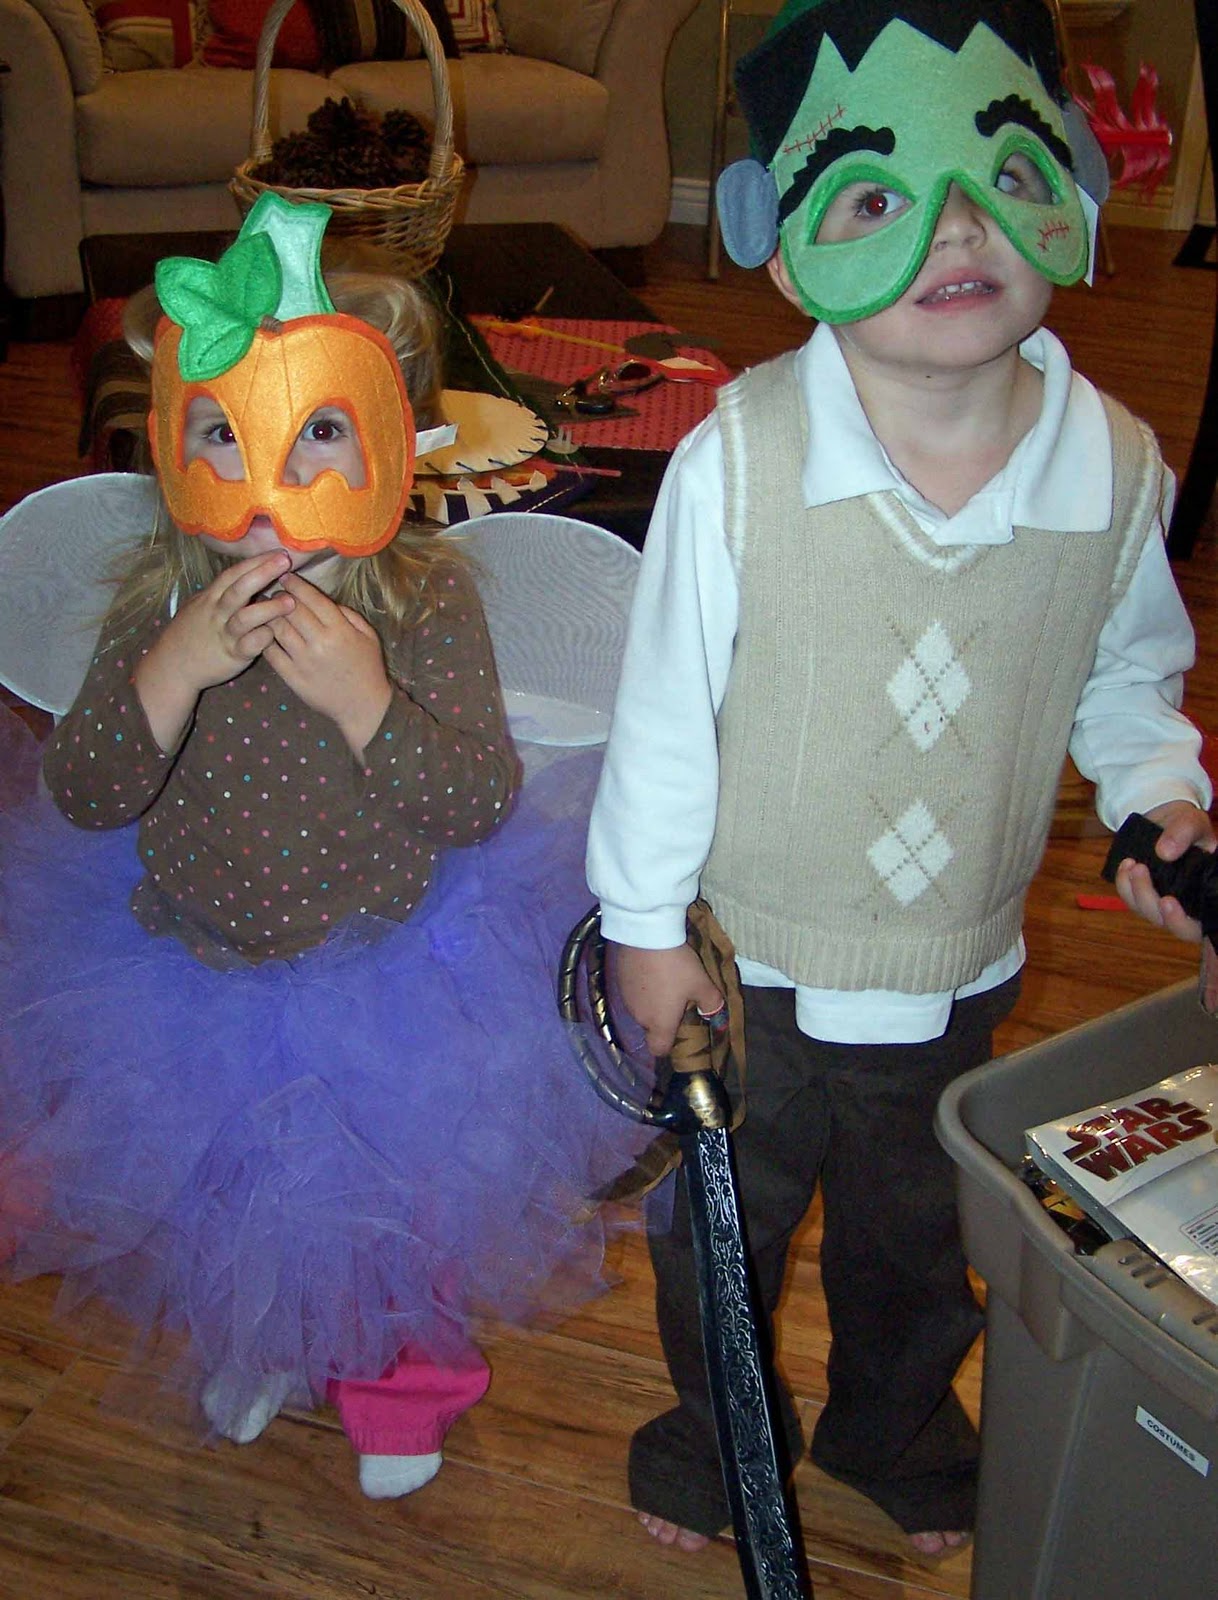
Never underestimate the power of a simple accessory. Brayden often uses a sword, a hat, and a bag when playing pretend. He uses simple accessories more than he does a full-out costume. Hats, jewelry, bags, scarves...accessories.

You can give your kids things you were going to get rid of. One great example is purses. Rather than tossing or donating all of your old purses, save one or two for your kids. One of Brayden's favorite clothing dress-up items is a khaki vest my mother-in-law was getting rid of. I knew he would love it for his safari adventures.

We have a large rubbermaid tote that holds all of our dress up clothes. They are easy to access and easy for kids to clean up.

So encourage your children to play dress up and take themselves mentally to a different place full of exciting adventures!

Saturday, February 26, 2011

Blast from the Past: Snowman Projects


I was going to post these a while ago, but I never got them off my camera. Then things got warm and I was too busy enjoying 60 degree weather to talk about snowmen. Then the weather turned and I have over two feet of snow on the ground again, and I know many of you are sitting in snow, too, so let's acknowledge it and maybe enjoy some last snow projects for the year.

This first one is the Cotton Ball Snowman I posted about last year. This year, I used scrap fabric for the scarves, which I thought was fun. Above is Kaitlyn's (age three) and below is McKenna's (age one). For McKenna, I pointed to tell her where to put the cotton balls. Kaitlyn did something new and fun. After making her bottom "ball," she decided to pull the cotton balls apart to make her snowman.


Next is the Snowman Shape Picture. I did this with Kaitlyn's playgroup and every single mom asked, "Did he/she really do this alone?" Yes they did! And here are the three my kids did. Top is McKenna's (age one--it lost an eye between being done and getting a photo), bottom left is Brayden's (age five), and bottom right is Kaitlyn's (age three). Brayden and Kaitlyn both have a "house" that Brayden cut out and made for them.

I love how crooked McKenna's is. That is a picture I will keep forever I think.

Friday, February 25, 2011

Dr. Seuss Story Time at Target

This Saturday, February 26th, Target stores across the country will be hosting a Dr. Seuss story time from 9-11 AM.
It's free, there will be giveaways, and coupons.

Check out the Target link for more info and to find a storytime near you!!

Thursday, February 24, 2011

I for Igloo

This igloo craft was a lot of fun to make and I think it turned out really cute too!
 
What you need:  blank label stickers (I actually used mailing labels and cut them down to size), construction paper, scissors, glue, black marker
What you do:  Have your little one build a wall on the construction paper, using the labels.  Once they're finished, turn the paper over and draw a semi-circle on the back.  Either have them cut out along the line or you do the cutting for them.  To create the door, cut out a second semi-circle and have them color a black door, then glue the smaller piece on top of the larger one.  After gluing his igloo together, J added some snow to his picture.
This was honestly supposed to go with a winter unit I was going to do with J... but 3rd trimester exhaustion has set in so the unit didn't happen.  I ended up cutting out the upper and lower case letter I, letting him fill those in with "ice blocks" and decided reinforcement learning was enough this day!  J was quite proud of his final work of art.

This idea is from the Frugal Family Fun Blog.

Wednesday, February 23, 2011

Surviving Winter: Winter Sports


Now that my kids are getting a little older, I decided it was time for us to pick up on winter sports. We live in an area where it is cold weather for nearly half of the year some years. Even in a warm year, you have at least three months where you don't want to be going outside much--and those don't come around very often (those warm years).

I decided we need to A) Do something that required some physical activity and B) Do more than "survive" winter--we need to "thrive" through winter! Enjoy it! Have things to look forward to! A winter hobby that made us excited to see winter come.

There are a lot of winter sports: snow shoeing, cross country skiing, snowmobiling, snowboarding, skiing, and ice skating name a few. We decided to go with ice skating this year. We signed up for lessons for Brayden (5) and Kaitlyn (3). McKenna will be able to start lessons when she is 3. They both had a great time. I don't feel bad about Brayden not taking lessons until he was 5 because he caught on quickly. Kaitlyn was timid and slow about it, but I don't feel bad about her starting at 3, either. She was able to pass level one, though I do think we will put her in level one again the next time she takes the class just so she can get a really solid foundation under her before moving on.

So my point here is, find something your family can do during less than ideal weather that you can look forward to. Thrive--no matter what time of year!

By the way, I got thinking that since this is an indoor rink, ice skating will be a great summer activity, too! It will be fun to go cool off! We do also have outdoor rinks here in the winter--so this will be a relatively easy and inexpensive winter sport to pursue as a young family.

Monday, February 21, 2011

Following the Leader


I always want to have some way to celebrate President's Day. I think learning about our presidents is highly valuable, but I do struggle with ideas for the little ones. For some reason, I get stuck with history lessons in my mind. Last year, we did Cleaning Coins.

This year, I was thinking of a good vocabulary word to go with President's Day and came up with "leader." The natural thought process with little children and the word leader is to jump to the game "Follow the Leader." My children LOVE this game!

You will have the most fun with at least three people to play this game. More can be even more fun. The more children you get, the more issues you will have with turn-taking. Everyone wants to be the leader. It is a great chance to talk about sharing, turn-taking, not always getting to be in charge, etc., so if you can round the numbers up, it will be a great learning opportunity though I can't promise you will get through it pain free. Keep in mind training in times of non-conflict; explain the rules to your child before the game so she knows what to expect and you will make the process more smooth. 

You have the children line up. One person gets to be the leader and guide the line. That person can run, walk, skip, hop, twirl, etc. The line does what the leader does and goes where the leader goes. You take turns being the leader and being a follower. Fun for all ages!

Thursday, February 17, 2011

Homemade Highways

During the summer, we do a lot of learning with sidewalk chalk outside.  During the winter, I turn to painter's tape.  I love painter's tape!

This activity is really just a fun way to add a little variety to your day, especially these long winter days.  I set up a highway system on the kitchen floor using painter’s tape.  This took me about 5-10 minutes. This is even something your little ones can help with. J later made 2 requests that were easy to add on.  1. A garage to park some cars (my version is on the bottom right side of the pic) 2. Destination states (he’s VERY into states and geography. I definitely accomodated him on this one since it’s educational too.  I let him choose the states and just cut them out of construction paper and taped them down to the end of each roadway.)

Add buildings and bridges with Legos or blocks, stop signs, railroad crossings, etc.  It could be as simple or extravagant as you want.  This picture is fairly basic, since it was honestly meant to keep J busy and focused in the kitchen while my husband and I moved furniture for new floors (woohoo!).


I'll admit, painter’s tape is not cheap.  While you really only use a small amount of the roll, I tend to leave these up for awhile to get lots of use.  I also reuse the tape to make other things later (letters, shapes, numbers,…). One reader adapted this idea by placing tape on a blanket that she could then put away any time she wanted.  Since the tape isn't permanent, you can change the road map easily or remove them completely for cleaning. 

Wednesday, February 16, 2011

Surviving Winter: Go Outside Anyway


During the winter, if weather permits, you basically need to just go outside anyway. Don't let snow stop you from doing things. Take the picture above for example. Snow everywhere, and yet swinging is still fun. Don't think the only things you can do in snow are sledding, building snowmen, snow angels, snow sculptures, or snow forts, etc.


There will also be times the weather changes for you for a day or two and you can do something like go for a walk! This year was literally the first time I have taken a child of mine on a walk in January. The winter before Kaitlyn was born, it would have been possible, but I have this mental block in my head for certain temperatures so Brayden and I never went for a cold winter walk. After a long, cold winter last year, I decided this year I would take advantage of any glimpse of nice weather I could get. 

It warmed up to the high 40s, which a few years ago would not have been walking weather in January in my opinion. But the day was sunny with no wind, so I dressed my girls up and we went for a walk! The sun shining on me felt so good, and I felt this renewed energy! I was ready for anything that day! I also ran into other moms out with their kids who had the same idea I had: get out while you can. 

So if you are like me and get a mental block in the winter, try to step out of it. Play with your outside toys when you can. Go for those walks. Fresh air and sunshine are so good for you physically and mentally. 

Spring time is approaching (faster for some than others). I suggest you decide now that you will be flexible and get out on any nice day you can. Just be ready to spontaneously put things off to get that outside play in when that nice enough day comes along.

For those of you surviving rainy seasons, think of ways to get out and play in the rain. Get appropriate gear so you can be comfortable and have fun outside! Outside play does not have to be reserved for 60-80 degree weather. 

Monday, February 14, 2011

"V" Is For Valentine


This is another activity Brayden did at preschool last year.

Start with a paper with a block letter "V" on it. 

Give the child some tissue paper to tear up. Then have the child glue the pieces into the "V." When you are done, you have a fun, textured V!

Thursday, February 10, 2011

Valentine Dump Truck Card

So many cute Valentine ideas are geared towards girls.  J made these Valentines cards for his cousins who would prefer trucks to hearts.  Candy always adds something special to the card too!

What you need:  Unopened box of candy and a few extra pieces of the candy, construction paper, cardstock, car stickers, marker, and glue

Prep:  I precut all the pieces of the truck for him to glue onto the cardstock and already had the "Happy Valentine's Day" message on the cardstock. 

J  put the shapes together to create the truck and added the box of candy last. 

The front of the card has a little road with some foam car stickers.  I thought it turned out pretty cute.
This is from Busy Bee Craft Kids.com .  They has a cute "Unloading some love" message for the card.  Of course, I didn't plan for the candy box to be glued on at a tilt like in the example (in effect, dumping its cargo).  Oops!

Wednesday, February 9, 2011

Valentine Magnets


You may have seen these around...they were quite popular around here about 4 years ago. We were learning about magnets a couple of weeks ago and I thought this would be a fun thing for my 5 and 3 year old to do.

AGE RANGE
Probably 3 or older is best. Kids, and grown ups, of all ages can enjoy this. Some 2 year olds might be able to do it (with lots of help). I decided my 21 month old was too young for this, especially because I knew my 3  year old might need a lot of help. 

SUPPLIES
  • Gems (used often in flower arrangements. I found the bigger ones at Michaels).
  • Magnets (small, round magnets that can hide on the back.
  • Paper (we used Valentine scrapbook paper as well as plain paper to write on)
  • Pencil
  • Scissors
  • Decoupage or Mod podge 
  • Foam brush
  • Hot glue gun (to be used by you only!)
ACTIVITY
  1. Give your child a paper and a pencil.
  2. Give your child the gem to trace onto a piece of paper. 
  3. Have your child cut the circle out. The nice thing is this doesn't have to be perfect.
  4. Have your child use the foam brush to put the glue on the flat side of the gem.
  5. Have your child put the paper on the gem so it can be seen from the front.
  6. Have your child put another layer of glue on the back of the paper.
  7. Let dry. It will take some time, so clean up, take a nap, play....whatever.
  8. Once dry, use a glue gun to glue magnet onto the back of the paper. Let dry.
  9. Put it on the fridge!
You can do this for any holiday or any other reason you want to! You could do the child's name to hold up pictures the child made, letters, numbers, shapes...endless possibilities! You can write on the circle, draw pictures, use stickers...lots of fun.


Cutting the circle out

Gluing the paper on


Tuesday, February 8, 2011

Heart Hands


This is something Brayden made in Kindergarten this year. Handprints in the shape of a heart! So cute. 

Very simple. Take a piece of paper. Get some red paint. Have your child paint his hand red. You might help him if you want him to do both hand prints at once. Have him press his hands onto the paper so they look like a heart. Let dry.

It came with this poem:

My little hands
Have come to say
I give you all my heart,
For being the best
Kind of parents
Right from the very start!

(you could insert anything for parents: aunt, cousin, grandma, friend, teacher, etc.)

Monday, February 7, 2011

Valentine Candy Sort


This is something Brayden did in preschool last year.

SUPPLIES
  • Paper with hearts
  • Crayons
  • Conversation hearts
ACTIVITY

You start with a paper with several hearts on it. You then have your child color each heart a different color. You can see Brayden's teacher labeled each heart.

You then get a box of those Conversation Hearts. Have your child sort the hearts into the correct colored heart on the paper. 

When you are done, you of course eat some!

Friday, February 4, 2011

Snowman Pancakes


My Mother-In-Law asked me the other day if I have a certain way I refer to my husband in my blogging...like the Pioneer Woman calls her husband the Marlboro Man....lots of women have a "name" for their husbands....mine is "my husband." But I think I might name him Pancake Man. He is the king of creative pancakes.

This simple pancake creation was created by him. The poor Pancake Man can't make "just pancakes" anymore--they have to be "some fun shape."

This one is quite simple. You pour three circles--make sure they connect. And of course, make sure they are different sizes like a snowman. Flip the snowman over when it is ready. Now, for the mouth, you take a miniature marshmallow and stretch it out for the smile. Place it on while side two is cooking. It will melt. Place chocolate chips on when you are done. Viola! A nice, large pancake!

Thanks Pancake Man.

Thursday, February 3, 2011

Snowbox

In light of the blizzard that just blew across the entire country and the ridiculously cold temperatures we're all experiencing, I thought I'd first share a great way to enjoy the snow AND the warmth of the indoors.

While I currently live in the north, I am a southerner at heart.  One thing I learned after moving is that it takes a lot of time dressing a toddler for snow!  Do I dress him up first or get dressed myself?  Once we got dressed (probably overdressed!), how is he supposed to play with those crazy mittens on!  Bottom line, it is just too cold and windy outside.

Something clicked in my brain one day, why not bring the snow inside!  A snowbox solved all my problems.  I just bring the blow up pool inside and fill it up with snow. Easy to set up, easy to clean up.  Add some shovels and dump trucks and J is in heaven.  He could enjoy the snow and the blessings of a heated home at the same time (and mom can too)!  We dug, dumped, built a miniature hill for his rubber ducky to sled down, built a snowman, a snow wall (that of course was crashed a couple dozen times), and of course he loved letting a snowball melt in his mouth.  J didn't want to get in the "snowbox" and I didn't push it.  He had plenty of fun working from the outside in.  I was also surprised at how long the snow lasts inside too. When it hits the icy stage, it just made it easier to build with.  Set it up near a door and it's easy to refill with fresh snow. 

You know it's a success, when they continually ask for more snow in the pool.


22 months
22 months

21 months

Meet Your Authors: Becca

Hi! I'm Becca, a stay-at-home mom to an almost 3 year old (34 months) and soon to be born baby brother.  I've been married to my amazing husband for 6 years.  Prior to J's arrival, I taught jr. high and loved it.  Well, I loved most of it! I love helping kids learn, love the shocked expressions as they find enjoyment in it, love seeing the light flicker on, and love watching them sense their accomplishment.  Now I get to experience all of that with my son.

The beauty of teaching toddlers is their interest is already there.  All we need to give is our focused time, time to talk, to answer questions, to play, and to offer opportunities they wouldn't be able to accomplish on their own.  This is something every parent can do and it's more than worth it in the end!

I'm so excited to join Val, Manda, and Raegan here! Hopefully I can share some fun and practical ideas that both you and your little ones will enjoy. 

I'm also the author of Fun and Engaging Activities for Toddlers.

Wednesday, February 2, 2011

Shadows and Shadow Puppets

Image Source

This week, we are talking about shadows with it being Groundhog Day and all.

We started off with talking about our shadows, and since it was a nice and sunny (though cold) day, we went outside and watched our shadows. We ran and danced to see what our shadows would do. We also touched our shadows. It was fun to watch little 22 month old McKenna walk a while as she tried to catch up to it before finally just bending over and touching it.

Once we were done exploring our shadows, we were ready to try making shadow puppets. You can do this quite simply, but I found a fun website called Shadow-Puppets.com that has some fun ways to do different shadows. I am not all that creative with such things, so this was great.

Image Source

Tuesday, February 1, 2011

New Author!

We are so excited to welcome Becca to our posting team!

Becca has great ideas, and shares them at her blog Fun & Engaging Activities for Toddlers. We are excited to have her post here, too!

Welcome, Becca!

LinkWithin

Related Posts with Thumbnails