Pages

Wednesday, April 27, 2011

Pom-Pom Spring Chick


This is a fun little craft Brayden brought home from school at the end of his egg unit. It is simple and something you can use to decorate for spring with!

AGE RANGE
You could adapt this as young as a toddler, but the most rounded learning will come for the preschoolers and up.

SUPPLIES
  • Yellow pom-poms--one small and one large
  • Styrofoam egg carton
  • Orange paper
  • Black marker
  • Glue
ACTVITY
  1. Before you begin, gather supplies. Cut egg carton up so each section is individual.
  2. Have your child cut the edges of the egg carton section to look like a cracked egg shell edge.
  3. Have your child glue the large pom-pom in the egg.
  4. Have your child glue the small pom-pom on top of the large one.
  5. Have your child cut out an orange diamond shape for the beak and glue it on.
  6. Have your child make two eyes with the black marker.
  7. Let glue dry and then display it somewhere!

Monday, April 25, 2011

Pussy Willows


This activity is quite common in preschool and Kindergarten classes. It is simple, but involves paint and children love paint!

SUPPLIES
  • White paper
  • Brown crayon
  • Gray paint
  • Optional: Paint shirt and tablecloth. Paper towels also help keep painted fingers off of clothes :)
ACTIVITY


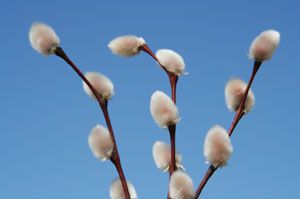
  • You might want to start by showing your child either an actual pussy willow if you have them by your or by showing them a picture of a pussy willow so they know what they are making.
  • Have your child draw three stems with the brown crayon.
  • Have your child dip his finger in the gray paint and dot the stems with it. 
  • Let dry!
POEM
You might add this poem to your activity:

Pussy Willow

Close your eyes
And do not peek
And I'll rub Spring
Across your cheek.
Smooth as satin,
Soft and sleek.
Close your eyes
And do not peek.

-Aileen Fisher-


Friday, April 22, 2011

Healthy Cookies...yes, you read that right!


When you have kiddos, the temptation (at least for me) to make fun treats all the time is overwhelming. I love any kind of cooking with my kids, but baking without always making something that'll end up calling my name to finish once the kids are in bed...is really tough.

So I ran across this cookie recipe on a great website where the only questionable item in the recipe is dark chocolate (70%), I jumped on it! No sugar, no eggs, no white flour (no flour at all)!

Ingredients:
*3 large ripe bananas


*1 tsp vanilla


*1/4 cup coconut oil, warmed so it isn't solid (or substitute olive oil)


*2 cups rolled oats


*2/3 cup almond meal (I get this at Trader Joe's. Or you can make your own by pulsing almonds in the food processor until it's a sandy texture. Just don't over process, or you'll get almond butter)


*1/3 cup unsweetened coconut, shredded


*1/2 tsp cinnamon


*1/2 tsp salt


*1 tsp baking powder


*6-7 oz. chocolate chips or chopped dark chocolate bar


Oven to 350*


Combine bananas, coconut oil, and vanilla in large bowl. In another bowl, mix almond meal, oats, coconut, cinnamon, salt, baking powder. Add dry ingredients to the wet and combine. Fold in chocolate. The dough is looser than regular cookie dough...it's fine!!! Drop spoonfuls on to parchment, Silpat, or baking stone. Bake 12-14 minutes. The recipe said that just shy of 15 minutes was perfect for them. I got the same results...perfect at almost 15 minutes. Just don't burn the bottoms.


I prefer them warm, but they are good any way you serve them! Enjoy! A fun one to make with the kids!


Wednesday, April 20, 2011

Dye Eggs


I know most people will have dying Easter eggs in their heads as possible activities around Easter time, but I wanted to make sure it was on everyone's radar.


There are lots of kits to dye eggs you can buy at the store. There are kits with glitter, stickers, even outfits! (see below) You can also do some home-made dyes. The first thing you want to do is either blow out eggs or hard-boil eggs. You want to do the boiling with plenty of time before you dye so they can cool completely. 


This is a fun time to talk about colors--all things colors. Tint, shades, color mixing, etc. Have lots of fun!

Two year old Brayden happy after dying eggs

Capital and Lower Case Sort


Have you ever been out and about with your child(ren) and noticed that letters you thought they knew, they were unable to recognize on signs, books, and other places? Most of the time when we are teaching our kids letters, they learn to recognize the letters in something close to Times New Roman font. When presented with other forms of the letters, like other fonts, they hit a road block.

This activity is easy to do, and a great way to practice recognition of letters in multiple forms. Just open whatever type of Word program you have (or something of the like) and type a letter about 10 times for capital and 10 times for lower case. Then change the font for 9 of them and ta-da!

I cut them out and had the girls sort them, then glue. Check to make sure they are getting it before they glue, FYI.

Once they get the concept, it's something you can have them do independently. For me, it's something they can do while I work with another sibling with minimal interruptions.

Tuesday, April 19, 2011

Earth Day Painting


This is a simple activity that your children will love for Earth Day (this Friday). Your children will love it because children love painting.

AGE RANGE
This is something children of all ages can do. If you have a baby, you can help your baby do this, and I would suggest finger paints.

SUPPLIES
  • Earth coloring page print out. I used this one: http://parenting.leehansen.com/downloads/coloring/MISC/earth-color.gif
  • Paint of choice. You can do finger paints, tempera paints, water colors...whatever you want to. The photo above was done with water colors (by Brayden--age 5). Kaitlyn (3 going on 4) did both finger paints and tempera paints. McKenna (just turned 2) did finger paints.
  • Paper plate for holding paint. If doing water colors, you will need a small cup of water.
  • Paintbrushes if needed.
  • Optional: Tablecloth and paint shirts :). Also, a paper towel for each child will help keep things cleaner.
SET-UP
Set up table cloth, set papers out, and prep paint by pouring onto paper plates. Put paint shirts on children.

ACTIVITY
  1. Tell your children you will be painting the Earth today. You can either direct or let them choose their paint of choice. I let the older two choose, but chose for McKenna. 
  2. Talk about what parts are water and what parts are land, then talk about what colors each part are. 
  3. For the older children, I suggest you require they paint the land and water the correct colors. Kaitlyn is my ever-artistic child, and she wanted to do some unique colors, but this was an activity to learn about the Earth. There are times to do creativity with your own imagination taking over, but it is also important for children to be able to identify reality, too. For older children you could even take this a step further and add in the other colors of browns and reds you can see on the Earth and put them in the right place. This would add a nice geography aspect to the activity.


Here are the finished products. From left to right, McKenna's (2), Kaitlyn's (almost 4), Brayden's (5).

Monday, April 18, 2011

Easter Cupcakes


Here is a simple, fun treat to make with your children at Easter. If you let your children help with the whole process, you will work on math skills, cooking skills, colors, and fine motor skills.

Supplies
  • Cupcakes (either make from box or mix your own)
  • Cupcake paper cups
  • White frosting (buy made or make your own)
  • Optional: coconut
  • Green food coloring
  • Candy eggs (robin eggs, jelly beans, etc.)
  • Optional: licorice for a basket handle
Method
  1. Make the cupcakes. Be sure to let your children help add ingredients and mix the batter. Also, be sure to talk about the math involved on your child's level, whether on simple counting (one egg, two cups of flour, etc.), addition (we need three eggs. I have one, how many more do we need?), subtraction (we need three eggs, I added two, now how many more do we need?), or fractions (focus on the 1/4 cup of oil and such). 
  2. Bake cupcakes and let cool completely. You might want to bake one day and then decorate the next, or bake in the morning and decorate after dinner.
  3. After making the cupcakes, make your frosting. If you are making your own, you can add the math benefits here, too. You can also point out the changes that come to your frosting as you add liquids and as you add solids (it is thick, let's add some more milk. Ooohhh, look what happens! OR It is runny, we better add some more powdered sugar).

    Once the frosting is made, it is time to add your green food coloring and see what happens.
  4. OPTIONAL: You can dye coconut green to give more of a grass texture (or dye it other colors if you want to). My children don't like coconut, so we didn't do this.
  5. Next, you decorate your cupcakes! Let your children use a butter knife to spread the frosting on their cupcake. Then let them decorate with coconut and eggs. This creates a cupcake that looks like eggs in grass. You can also add a licorice stick from one side to the other to be a handle and you suddenly have an Easter basket with eggs instead! I plan do this version this year (photos are from last year), so I will post pics as I get them.


Wednesday, April 13, 2011

Easter Round-Up

Here are the Easter ideas we shared with you last year!

Color Matching--Easter Style
A great activity for teaching colors while using those Easter Eggs and cartons.


Counting With Eggs
Using Easter Eggs to do some counting activities!


Easter Basket Sensory Activity
Sensory activities are always a hit. Easter grass is a great texture you don't often find other times of year.

Monday, April 11, 2011

Recycled Earth Crayons


Last year for Earth Day, an activity we did was these Recycled Earth Crayons. I found the idea at Babycenter.com. 

The kids really loved this; they still talk about it every so often a year later! It is for ages 2-8. For instructions, go here. You will also see linked on that page other great Earth Day activities!

Wednesday, April 6, 2011

Paper Plate Elephant


Kaitlyn made this in playgroup. I thought it was super cute!

Supplies:

  • paper plate
  • construction paper
  • scissors
  • goggly eyes (or you could draw eyes)
  • glue
Method:
  1. If desired, have your child color the paper plate (gray if you want to stick to "reality," a color of your child's choice if you want to do "imaginative").
  2. Depending on child's age and ability, either you cut out or draw and let your child cut out the elephant's ears. 
  3. Cut out a circle on the plate for the "nose" (I would say this is an adult step)
  4. Have your child decorate the plate further if desired. Add eyes.
  5. Glue ears on plate.
  6. Play with your elephant! Stick your arm through to be the elephant's nose.

Monday, April 4, 2011

Making Work Fun


Cleaning and other work doesn't need to be boring in order to be an effective teaching tool for children. There is nothing wrong with making cleaning an enjoyable experience for the family. Here are some ideas to make cleaning fun:

  1. Music: Turn on some music to keep you moving! Sing and dance as you clean.
  2. Adventure: Turn it into an adventure. Dress up in your adventure clothes, find the messes, and attack them with your sponges and cleaners. We like to go on "treasure hunts" after a holiday. For example, we will go on a treasure hunt for our all of our Christmas decorations after Christmas is over. We find the decorations and bring them back to a designated spot. If something is too high to reach, the kids tell us where it is. This helps cut back on those missed decorations you find the day after you put the boxes away!
  3. Cinderella: My friend shared this. She and her girls pretend they are Cinderella and clean the house. When they are done cleaning, they dress up in their princess dresses and have a princess party.
  4. Chore Incentives: You can do chore cards, chore jars, sticker charts, lists...whatever keeps everyone motivated. Mix it up from time to time. Nothing will stay motivational forever--you need to change what you do every so often.
  5. Focus on the Serving: "Thank you for cleaning that! That is such nice service you are doing!" Use positive talk to thank your child for helping with the family chores. Even if something is "your job," it is nice to be thanked for it.
Doing chores around the house does so much more for a child than simply teaching a child how to work. Honestly, if all my child learned from chores was work ethic, that would be enough for me. People I admire in life are hard workers and learned how to work hard in youth. There is so much value in work ethic.

It will help your child be better citizens and most importantly better spouses and parents. I have in the back of my head a great gift I want to give to my future daughter-in-law--I want to give her the gift of a husband who is helpful in the home and is a hard worker. My mother-in-law gave that to me and I love it!

Work helps our mental development. It helps our character development. One of the best ways for me to get my five year old boy talking about his feelings is to work beside him for an extended period of time. At first, he talks about surface topics, but as time passes, he is soon talking about matters of his heart.

And on a more simple level, chores help children develop fine and gross motor skills. They help with colors (like when sorting laundry). You can work in shapes and counting. 

There is so much value to work! But remember that it is okay to keep work fun.

So, how do you make work fun around your house?